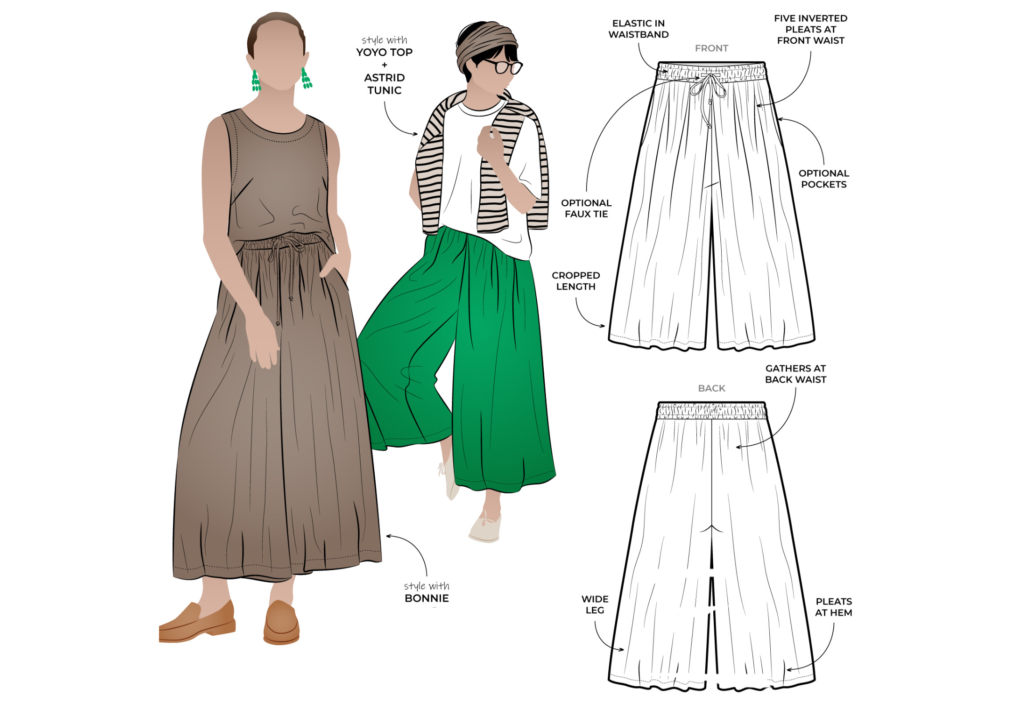
CONSTRUCTION:
INSEAM POCKETS:
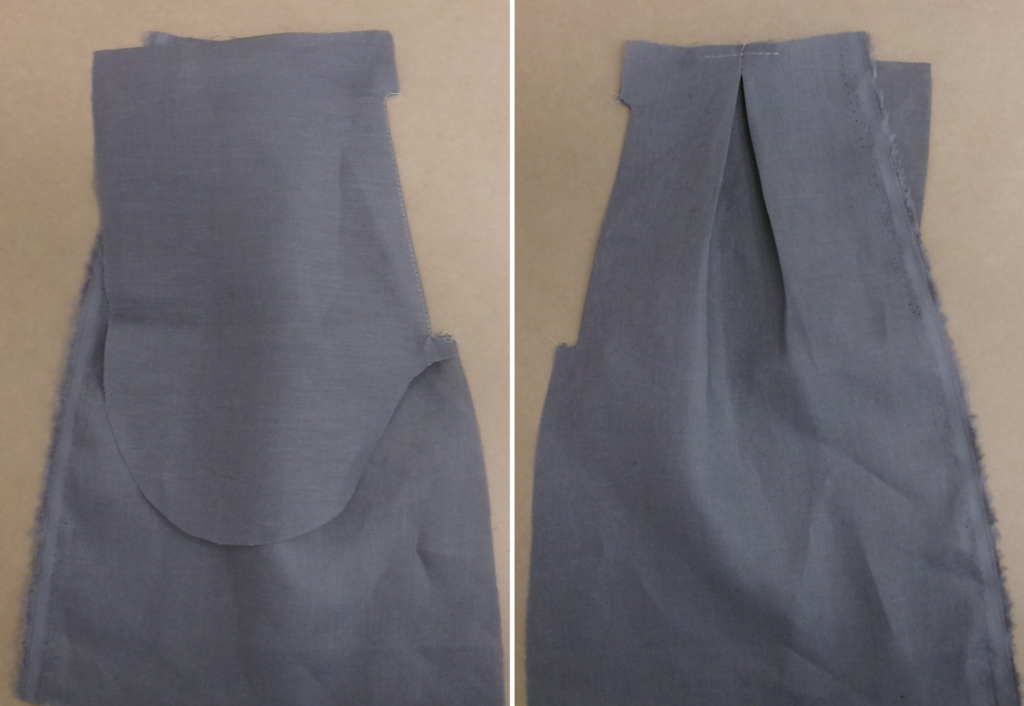
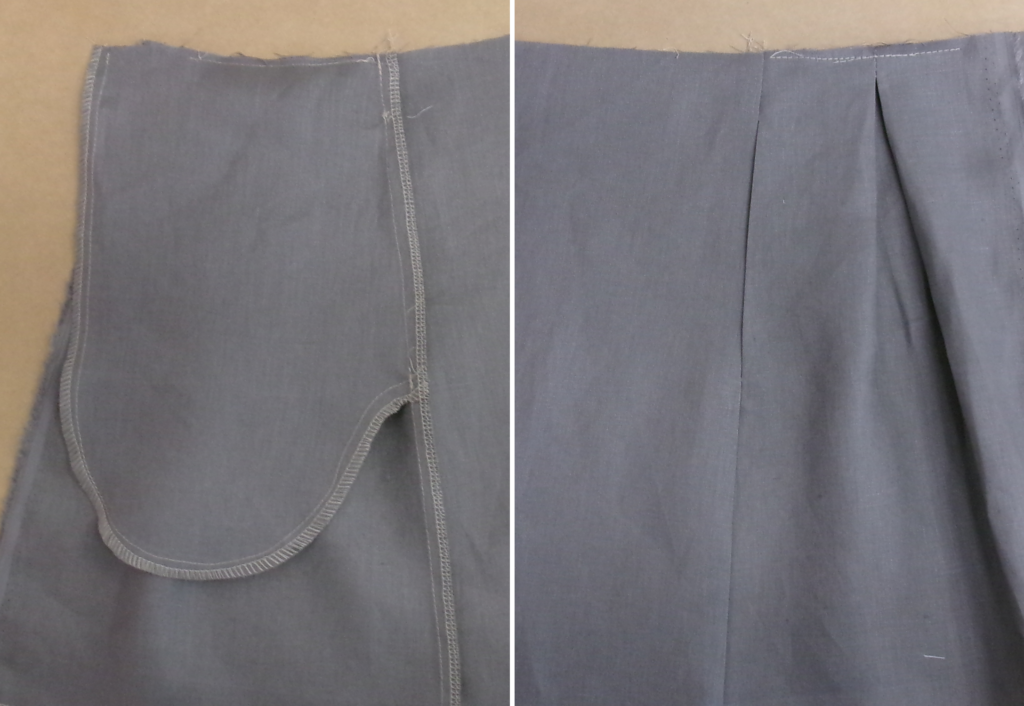
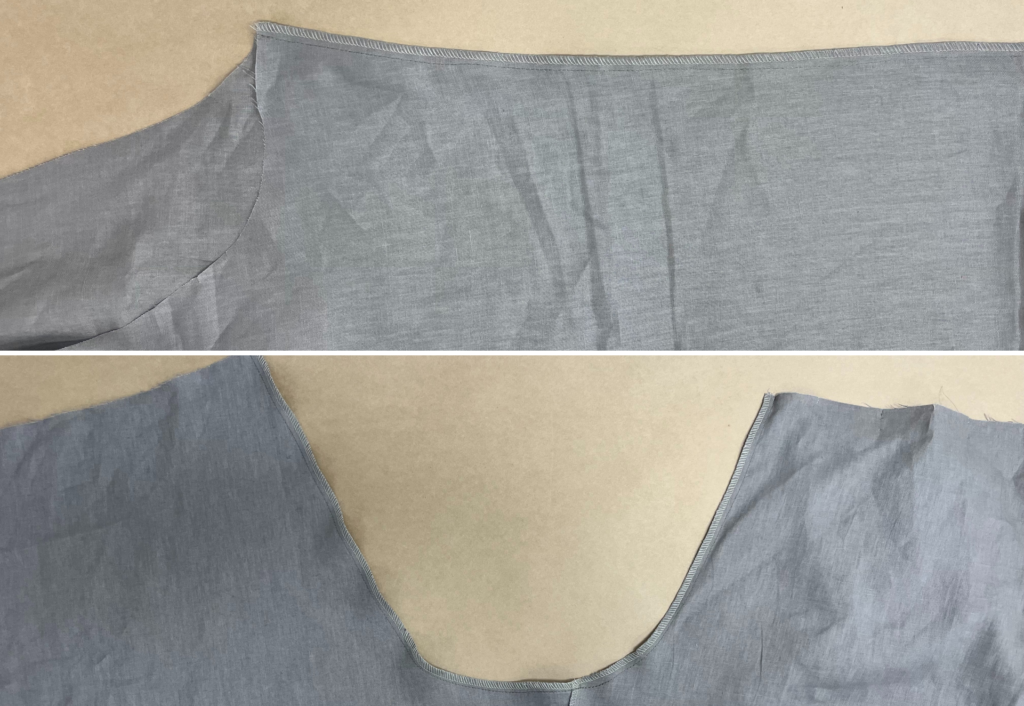
Sew one set of the pockets to the front leg side seam where marked on the pattern (A-A), sew only between the notches. Clip at the notches and understitch on the side of the pocket bag. Turn to the right side and sew a 1cm (3/8”) top stitch down the pocket opening and across the top and the base of the front pocket (optional).
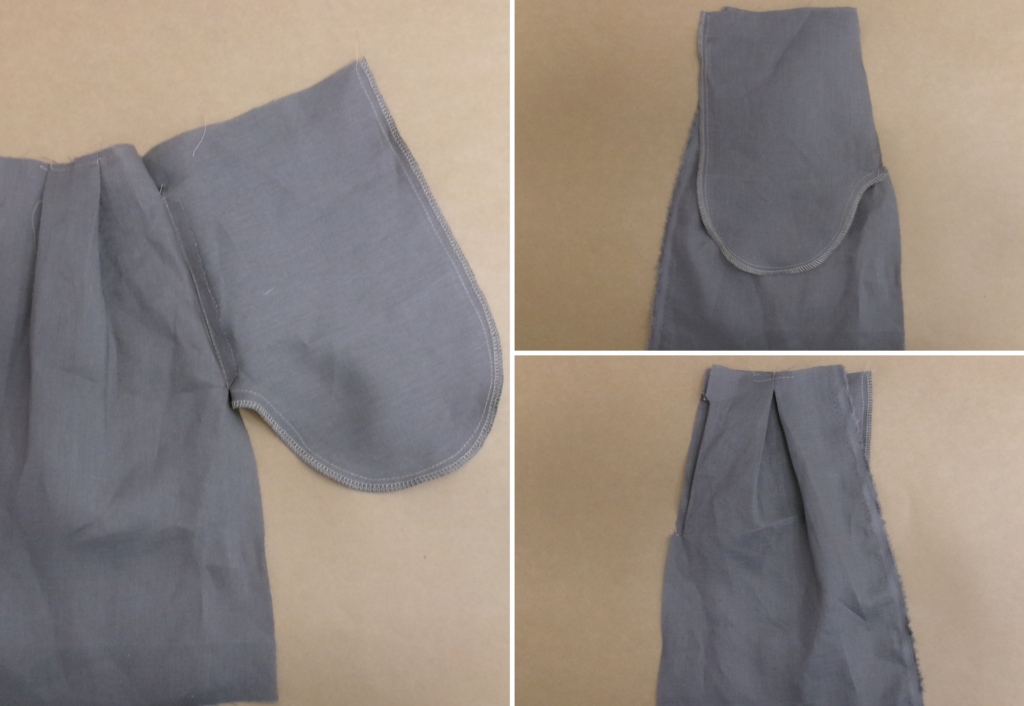
With RST, sew the second set of pockets to the pockets already sewn to the front side seam. Stitch the two pocket bags together around the outer edges, creating a pocket (B-B).
The straight edge of the under pocket is left free to sew to the back leg side seam. Neaten the outer edges of the pocket with an overlocker/serger.
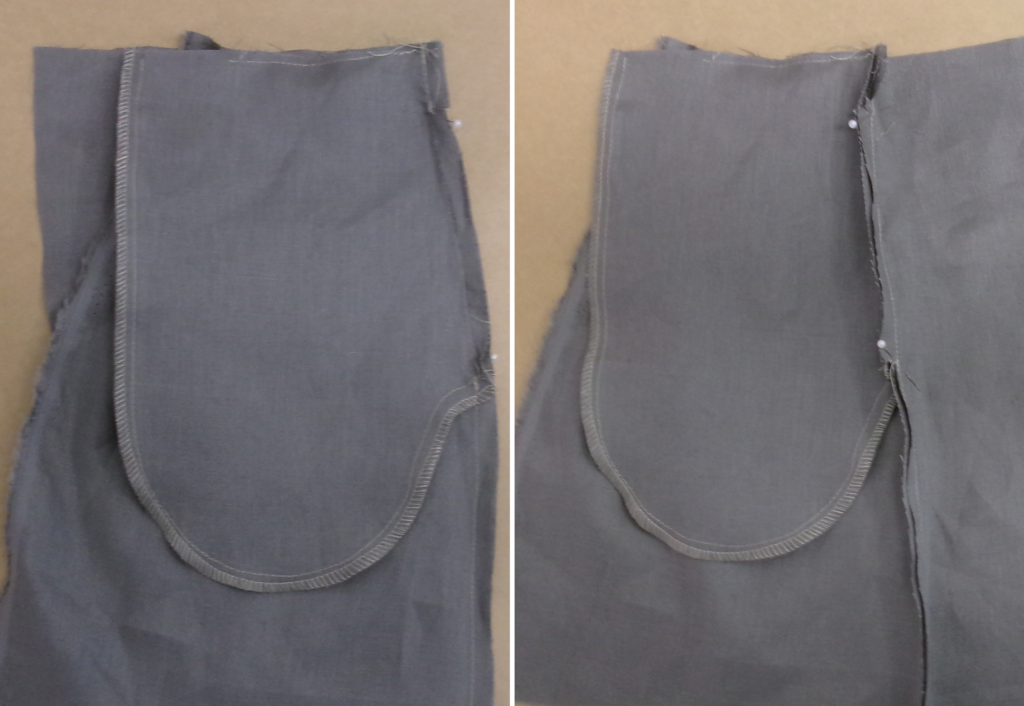
Fold the pockets to the inside of the front legs and baste them across the top front waist, securing the top edges of the pockets to the waist. Baste the side top and base of the pocket to the side seam.
LEGS AND PLEATS:
With RST, sew the front and back in-leg seams together. Neaten with an overlocker/serger and press towards the back.
With RST, sew the front and back crotch seams together, ensuring that the in-leg seams and notches align. Neaten with an overlocker/serger and press to one side.
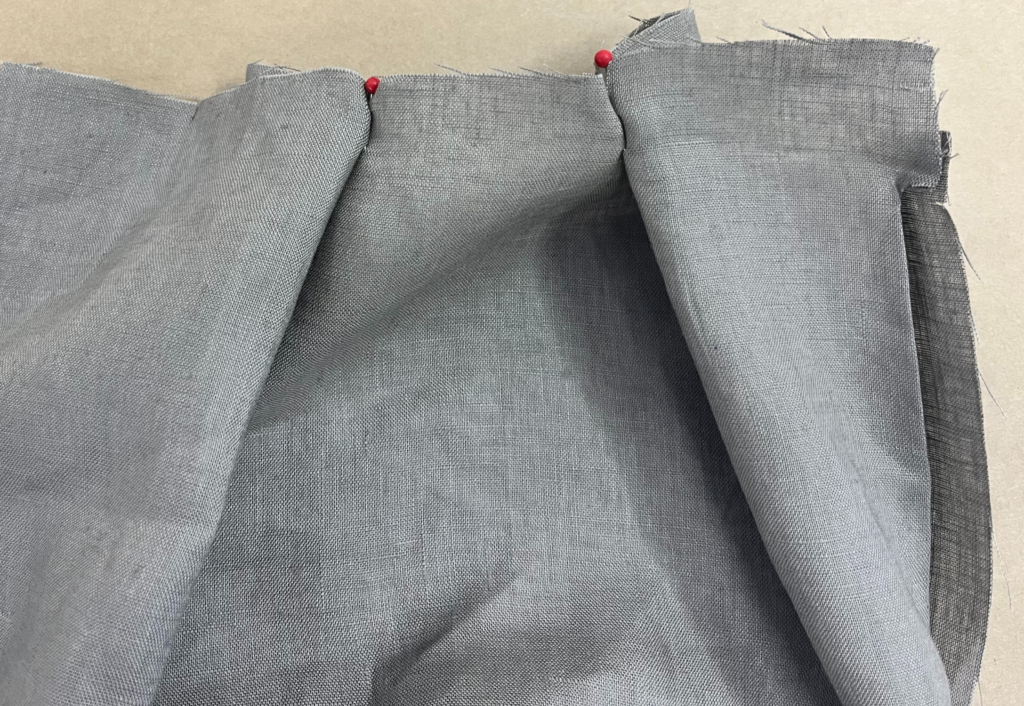
With the right side up, match the waist pleat notches together and pin. Stitch 1.2cm (1/2”) down from the notch. Open up the pleat and match the centre notch with the stitch line, creating the inverted pleat. Baste along the top edge of the pleat. Repeat for the other 4 pleats.
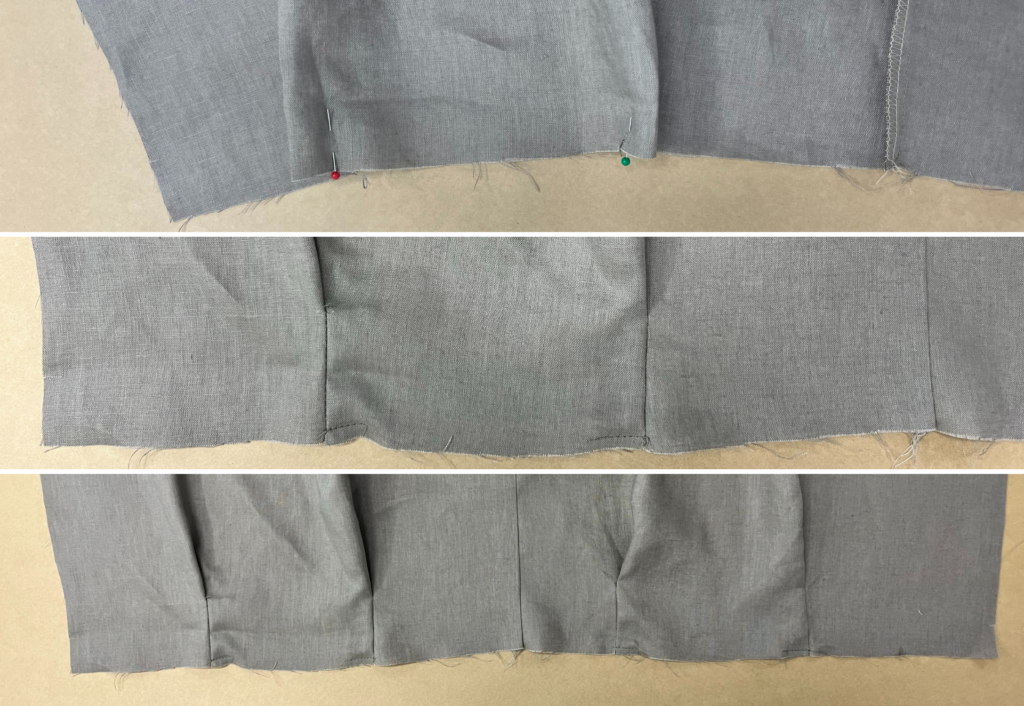
Now make the hem pleats. Pin the fabric with RST at the notches and sew from the edge up as far as the * as marked on the pattern (6cm or 2 5/8”). Fold the pleats in the direction of the arrows and baste along the edge of the seam allowance. Repeat for the remainder of the pleats.
With RST sew the back and front side seams together, matching the notches. Be careful not to sew the pocket openings closed. Neaten with an overlocker/serger and press towards the back.
WAISTBAND AND COMPLETION:
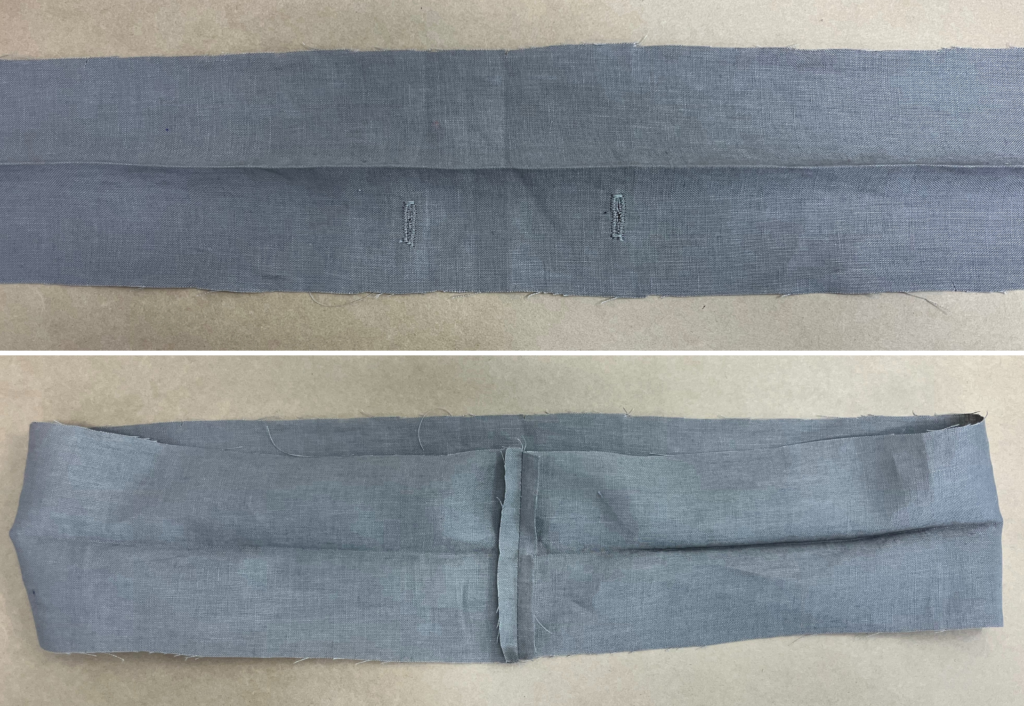
For optional waist cord only: fuse the wrong side of the waistband where the buttonholes are to go. Sew two buttonholes to one side of the waistband as marked on the pattern. With RST, sew the two short ends of the centre back waist seam and press open. Cut the elastic to your personal length, lay the short ends over each other and stitch firmly together. With WST fold the waistband in half lengthways and press.
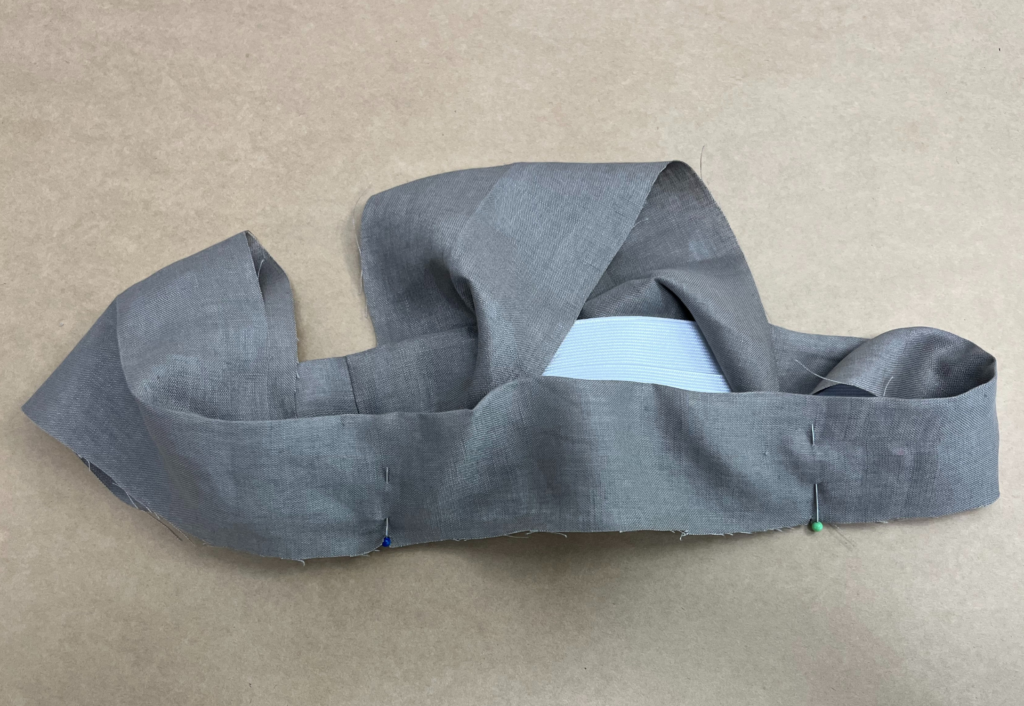
With pen or chalk, mark the elastic quarters (centre back, centre front and side seams). This will ensure the elastic is evenly positioned in the waistband, the chalk marks will match the notches. Pin the elastic into place inside the waistband close to the pre-pressed fold line and fold the fabric over to create the waistband.
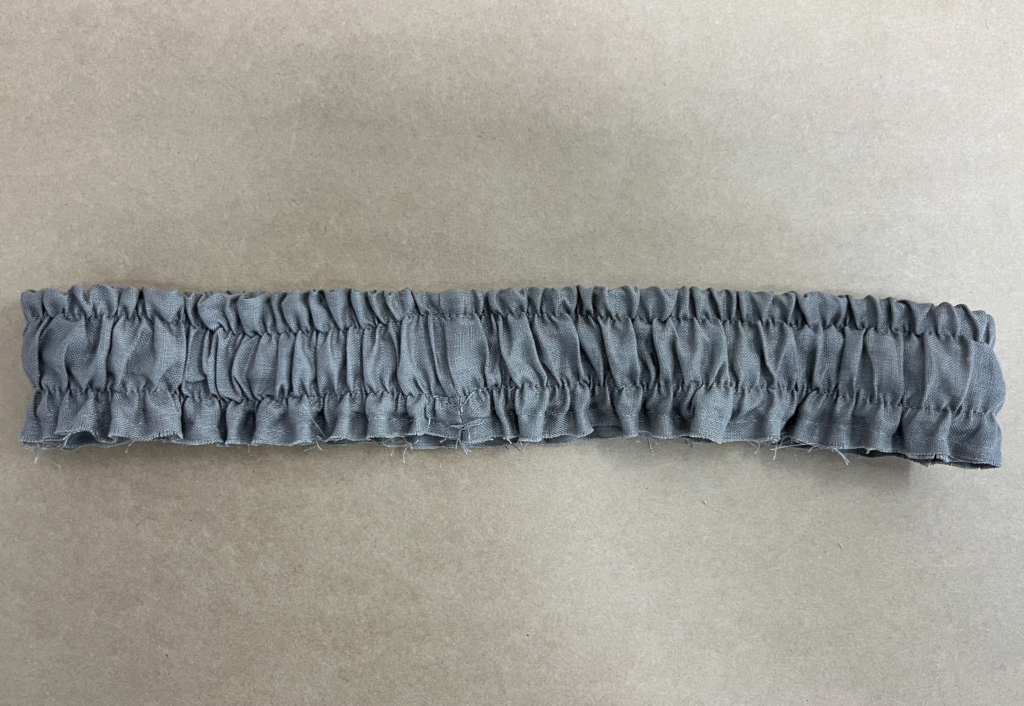
Topstitch the two rows of optional stitching through the waistband (where marked on the pattern) to create the cord channel, stretching the elastic as you go. Baste the raw edges of the waistband
together, then pin it to the top of the culottes, matching the notches.
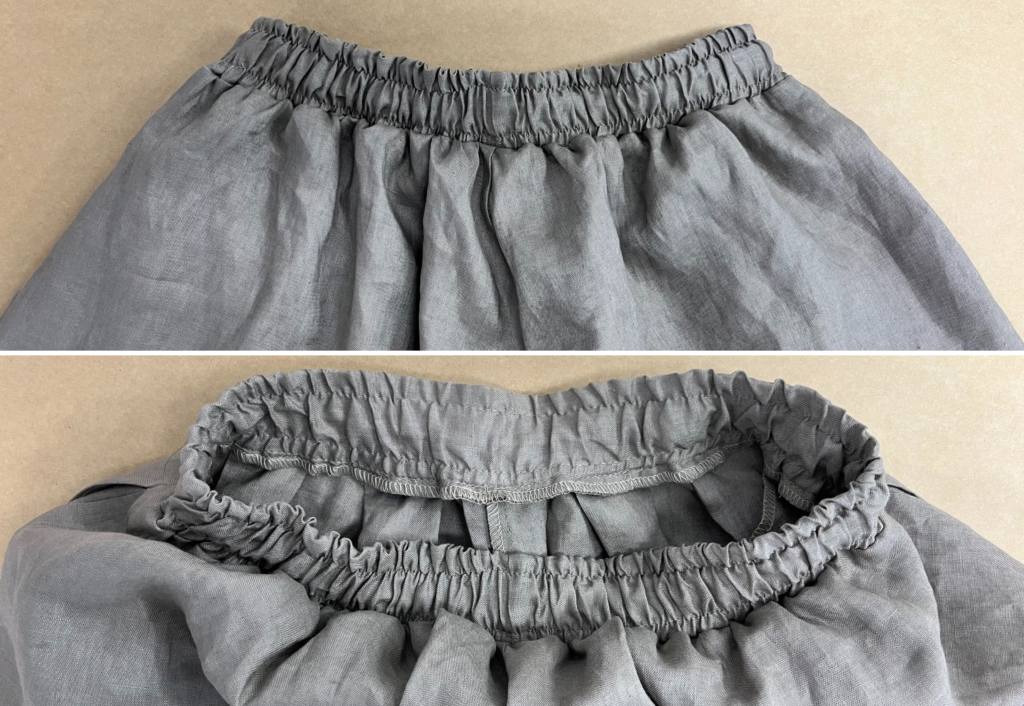
Once in place, sew the waistband to the top of the culottes. Neaten with an overlocker/serger and press downwards. If using the waist cord, thread into one buttonhole and out of the other.
Turn up the hem 1cm (3/8”) and press, then turn up again to your preferred personal length and topstitch. Press your new culottes!