The Emily Knit Top is our free pattern of the month for July 2014. You get it free with every order – but only in July 2014. You just need to let us know what size you’d like in the comments box when you order. It would be a very a simple make if it weren’t for the right shoulder twist feature. To help you through this step in the construction we thought we’d put together a little step-by-step guide to give you some sewing pattern tips on this feature. We’re hoping that a few pictures will tell the story. Here we go!
Step 1: Lay out the Pattern Pieces
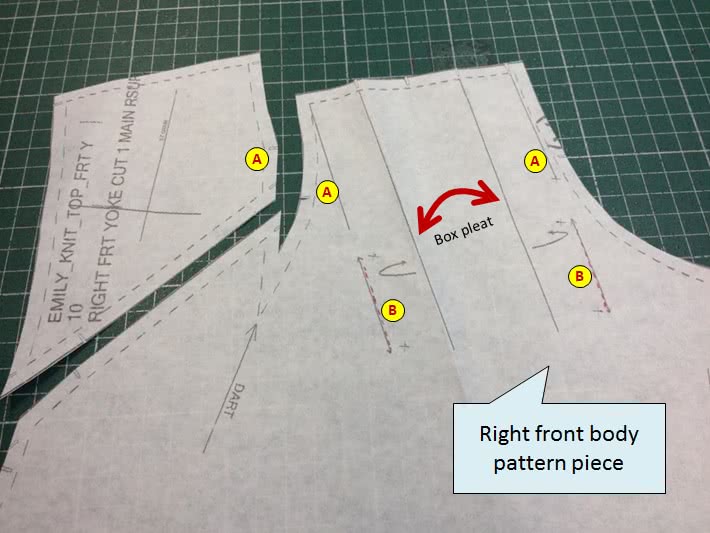
First, lay the pattern pieces out as shown below. Note the corresponding notches and “A” and “B” labels. Pin the pattern to the fabric. We’re just going to focus on the right shoulder in this tutorial… so we’ve only shown the right front yoke and right front body pieces in the picture below.
Step 2: Sew the Right Yoke Seam
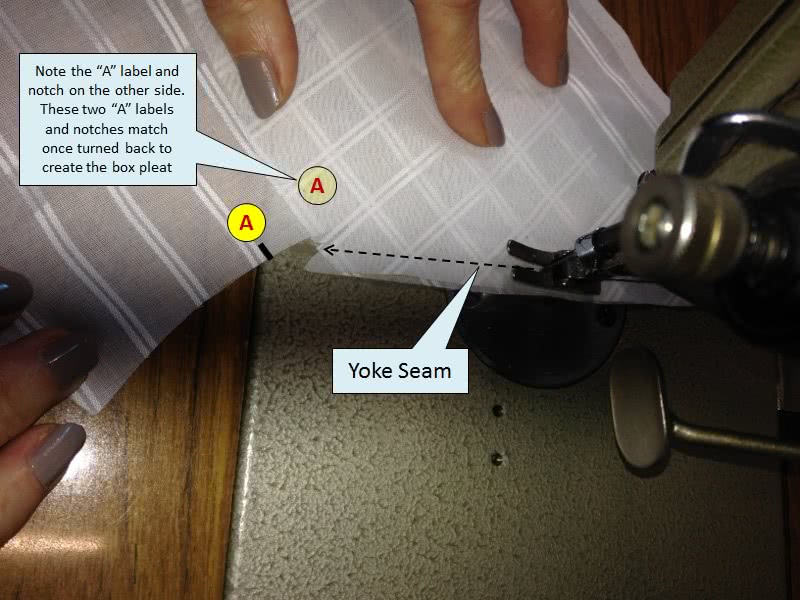
Next, sew the right yoke seam. There is a left yoke seam as well, but the tricky bit is on the right side. Yes, we know this is a knit top, and the pictures below show a woven fabric. We’re not great with photos, and the pictures using a knit fabric didn’t work out too well. Maybe the knit fabric was too dark? Oh well… hopefully you can see what’s going on better using a white fabric, even if it is a woven!
Step 3: Stitch the Dart
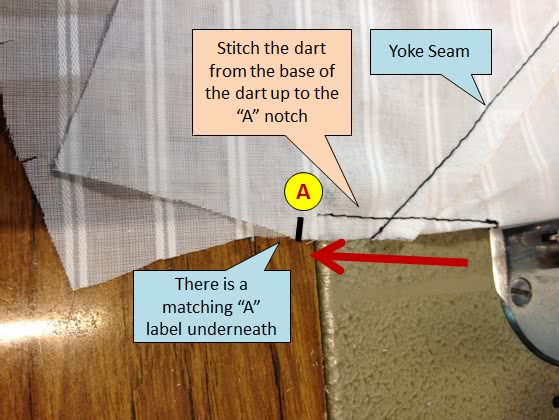
Next, stitch the dart up to the “A” notch.
Step 4: Starting the Box Pleat
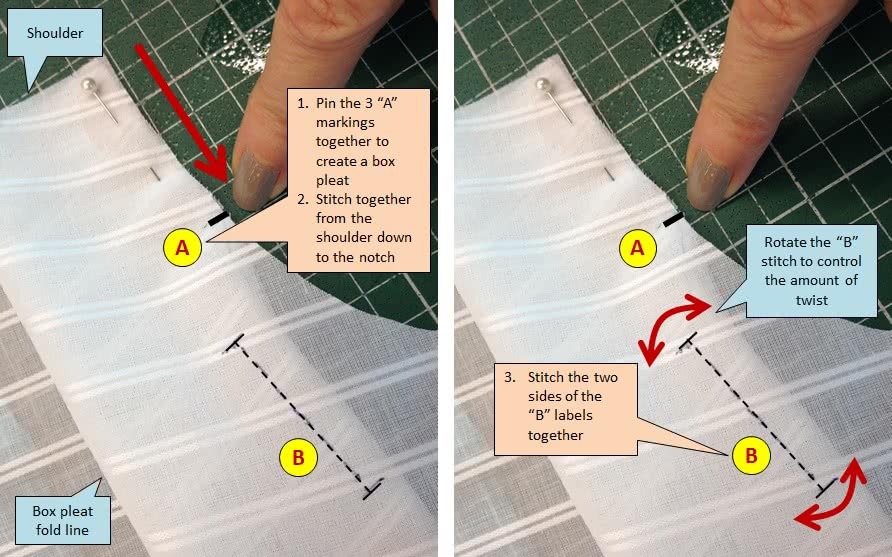
OK… now for the tricky part. Pin the three “A” labels together to form part of the front neck. Remember that you’re creating a box pleat, not an inverted pleat, when you’re folding. Note that the three “A” labels meet at the neckline. Once pinned, stitch from the shoulder down to the “A” notch.
Next up, you need to stitch the two sides of the “B” labels together. Note that the placement of the “B” stitch controls the amount of twist in the right shoulder feature. Rotate the stitch if you want more twist.
Step 5: Stitching the Neck Binding
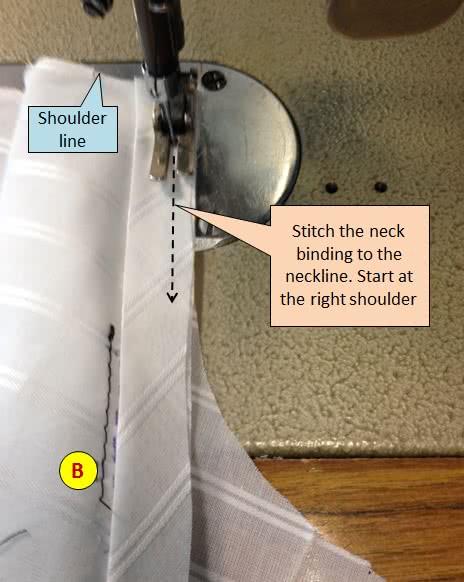
Here’s the next catch. At this stage you need to stitch the neck binding. Why? Well, the part of box pleat lies over the neck line. If you don’t stitch the neck binding at this stage, it’s not going to work!
Step 6: Completing the Box Pleat
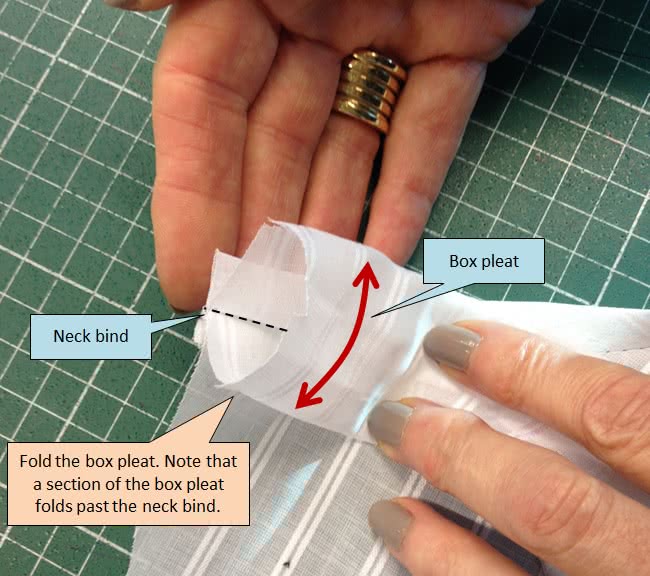
Now it’s time to finish the box pleat. When completing the fold note that a section of the box pleat folds past the neck bind. You can see this in the picture below.
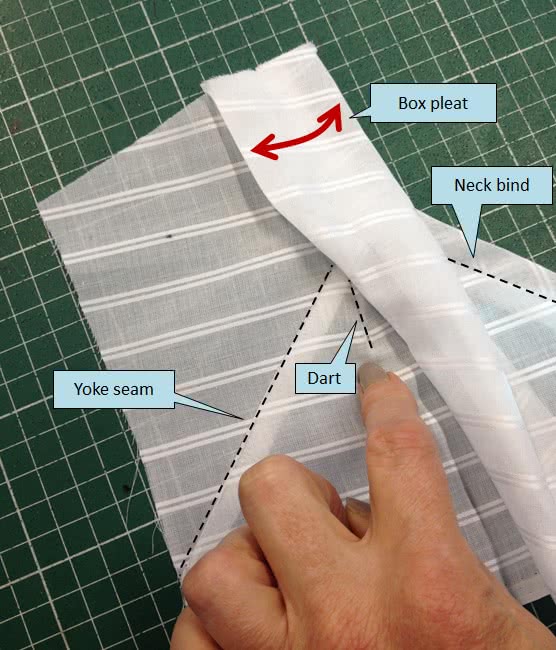
This is what it should look like once done…
From here on, it’s all really easy sewing. But let us know if you have any problems! Please feel free to add your own sewing pattern tips to help your fellow sewists in the comments section below.
Chloe x
