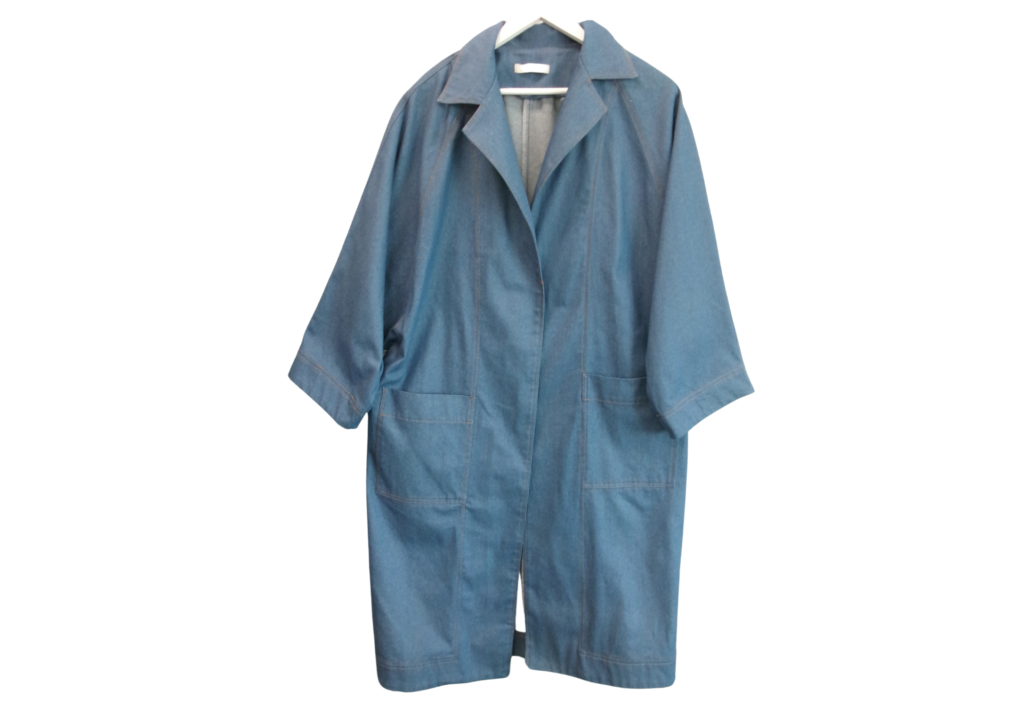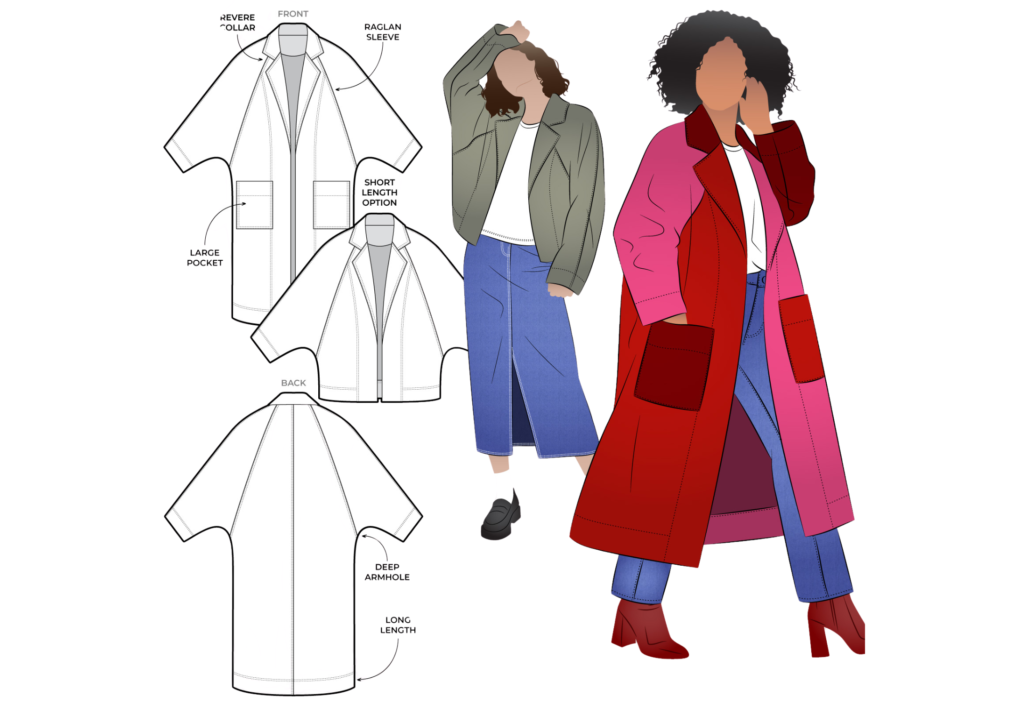
CONSTRUCTION:
FUSING:
Fuse back neck facing, centre front facing, collar, hem facing and cuff facings. If using a heavy denim fusing is not required.
MAIN BODY:
OPTION: If you’re using a printed fabric you might prefer to cut the Back (3) on the fold; if so delete the centre back seam.
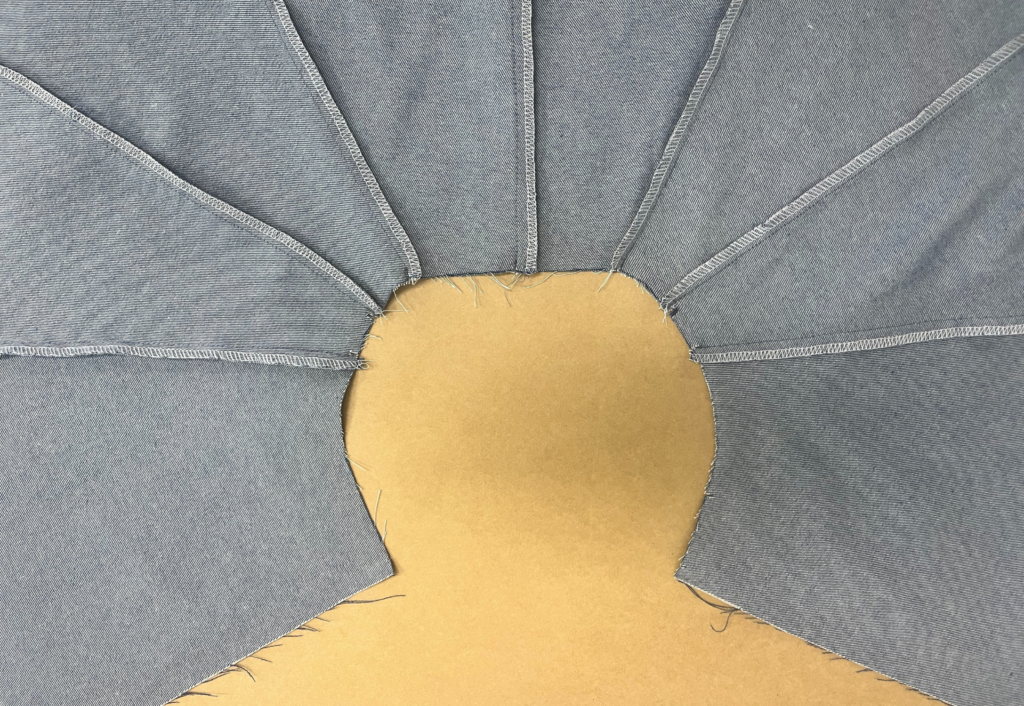
With right sides together and matching notches, sew back top sleeve (4) seams to front top sleeve (2) seams, matching notches, 1cm (3/8”). Neaten with an overlocker or serger. Press to the back.
With right sides together and notches matching, sew front sleeve (2) to front body (1). Neaten with an overlocker or serger, press to the front.
With right sides together and notches matching, sew back sleeve (4) to back body (3). Neaten with an overlocker or serger, press to the back.
With right sides together and notches matching, sew the centre back seam. Neaten with an overlocker or serger, press to the right.
Top stitch all seams 6mm (1/4”) or twin needle. Stay stitch around the neckline to prevent stretching.
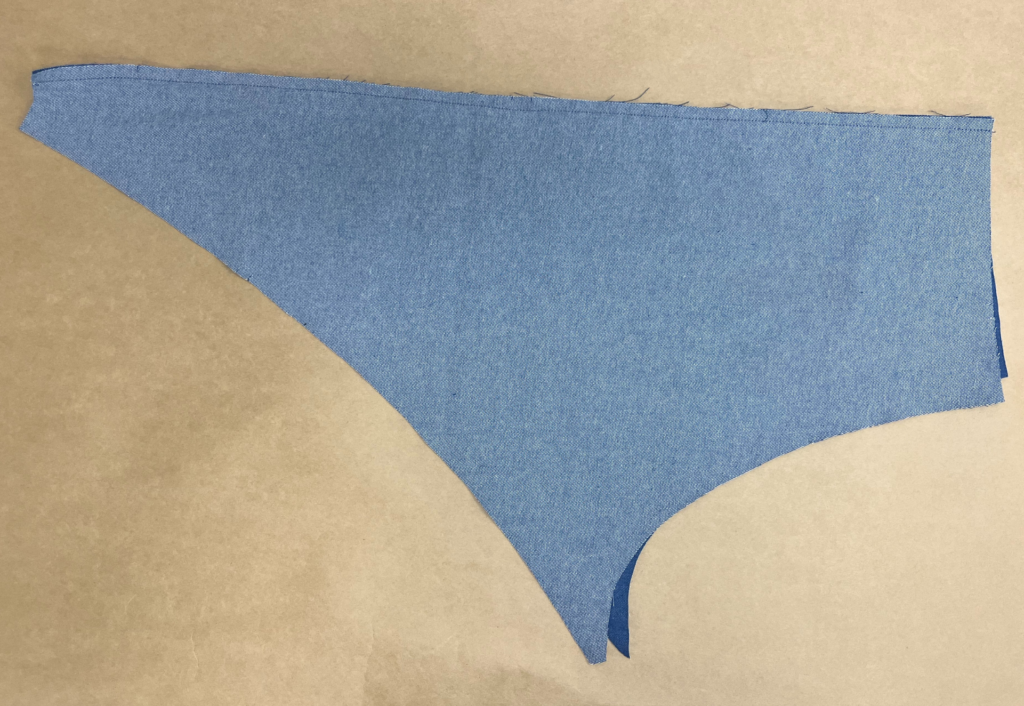
CUFF FACING:
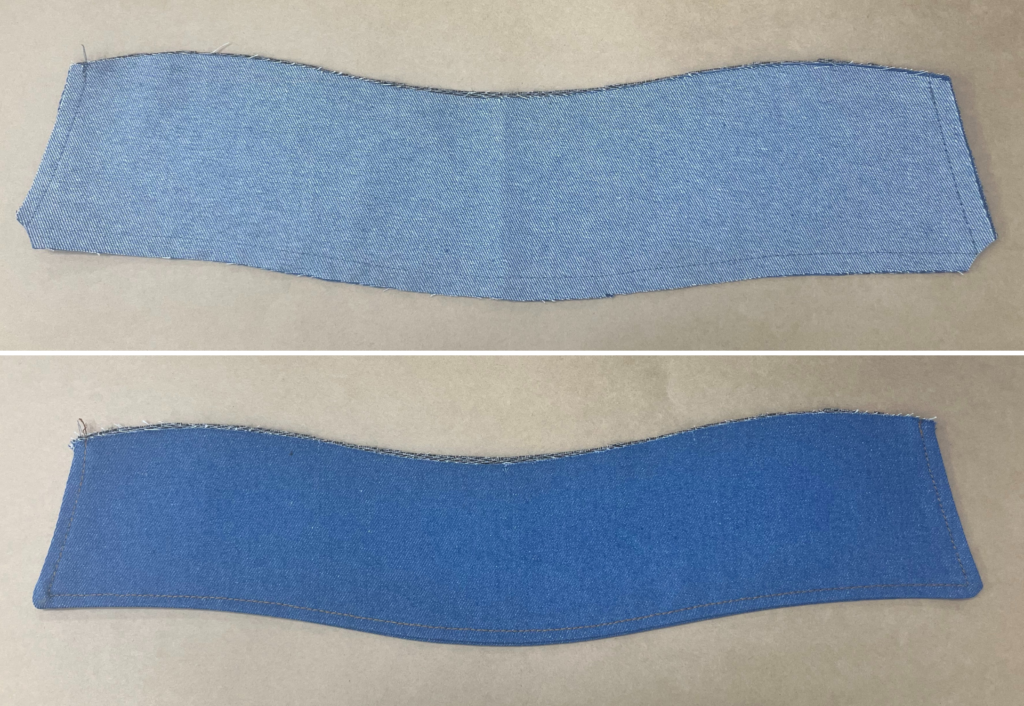
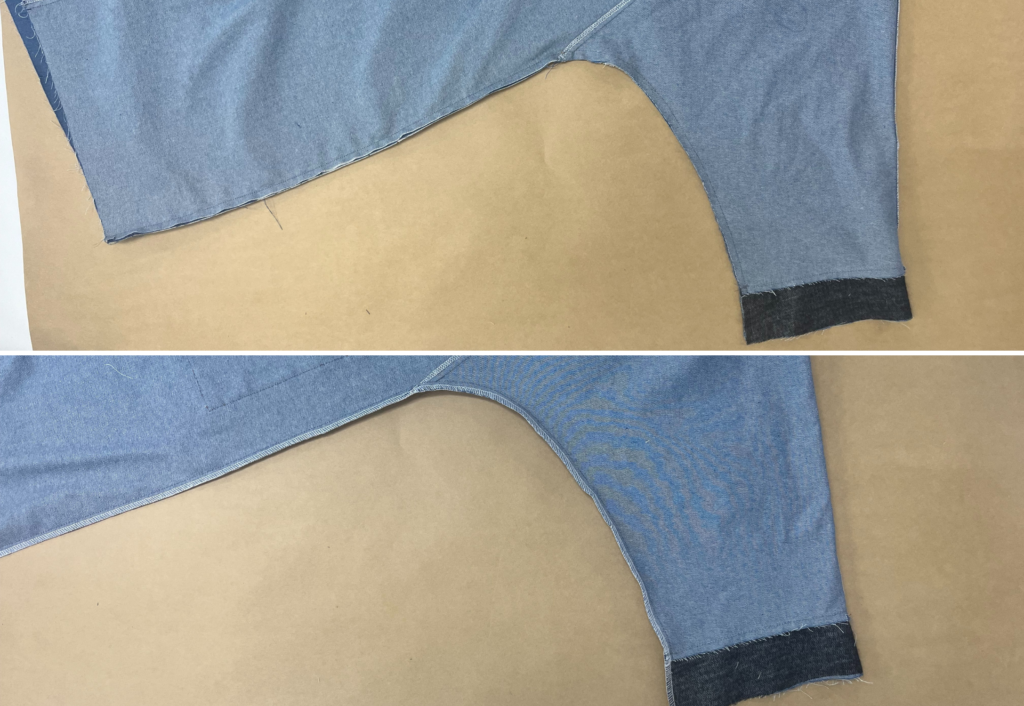
Open out the sleeve. With right sides together and notches matching, sew the cuff facing (10) to the sleeve. Stitch along the curved edge with a 1cm (3/8”) seam allowance. Clip the seam, press and understitch the seam on the facing side. Turn raw edge under 1cm (3/8”), press.
COLLAR AND NECK FACING:
With right sides together, sew the two collar (5) pieces together around the outer edge. Clip corners, turn out and press. Stitch a 6mm (1/4”) top stitch or twin needle around the three edges.

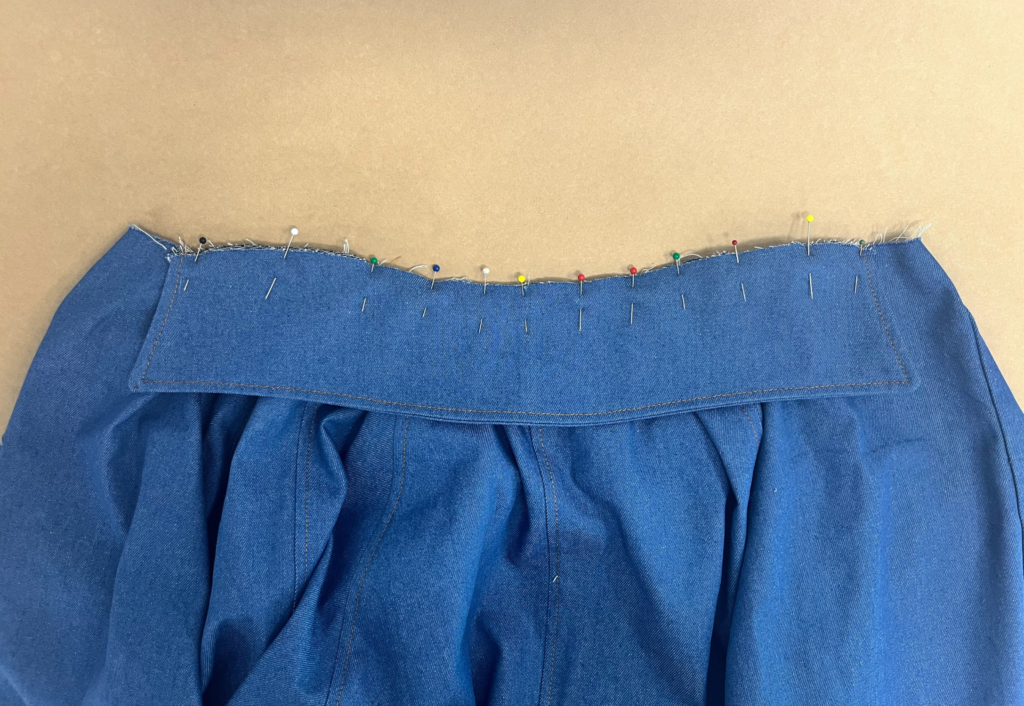
With right sides together, sew back neck facing (13) to front facing (8) at shoulders. Press seams open. Neaten around the outside edge of facing with an overlocker or serger. Turn this edge under 1cm (3/8”), press. (It isn’t essential to neaten here, but we find it helps to stabilise the fabric and keep the fold even).
With right sides together sew the front facing to the front (1) of the main body and press, then understitch the seam on the side of the facing from the hem to the break line notch.
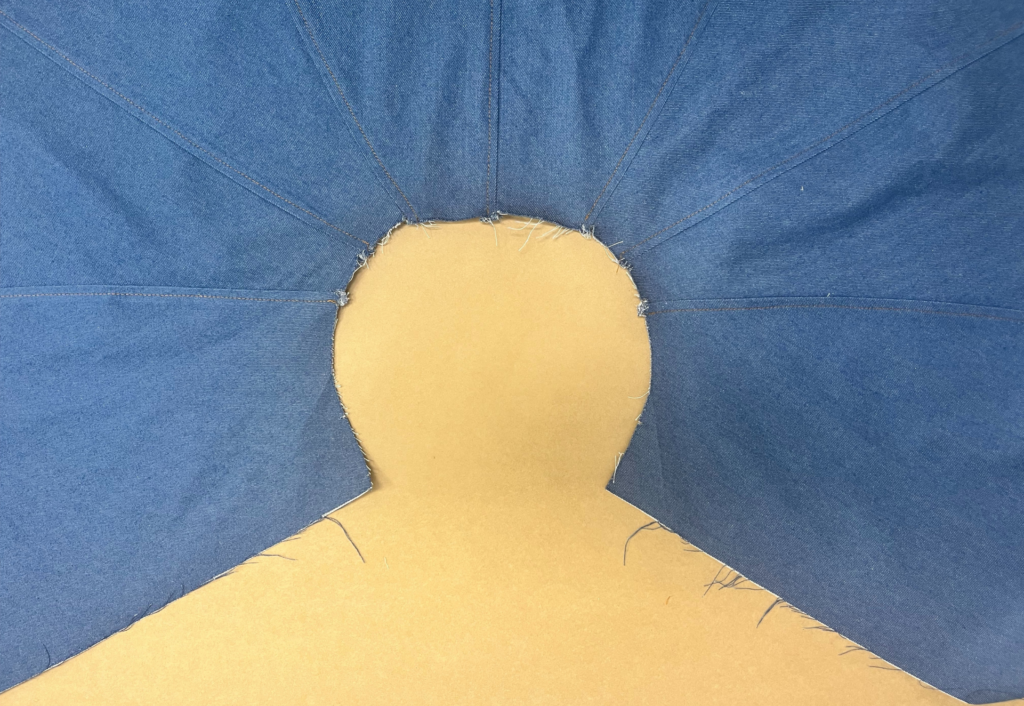
With right sides together, pin the inside edge of the collar to the neckline of the main coat, matching the notches. Baste the collar into place.
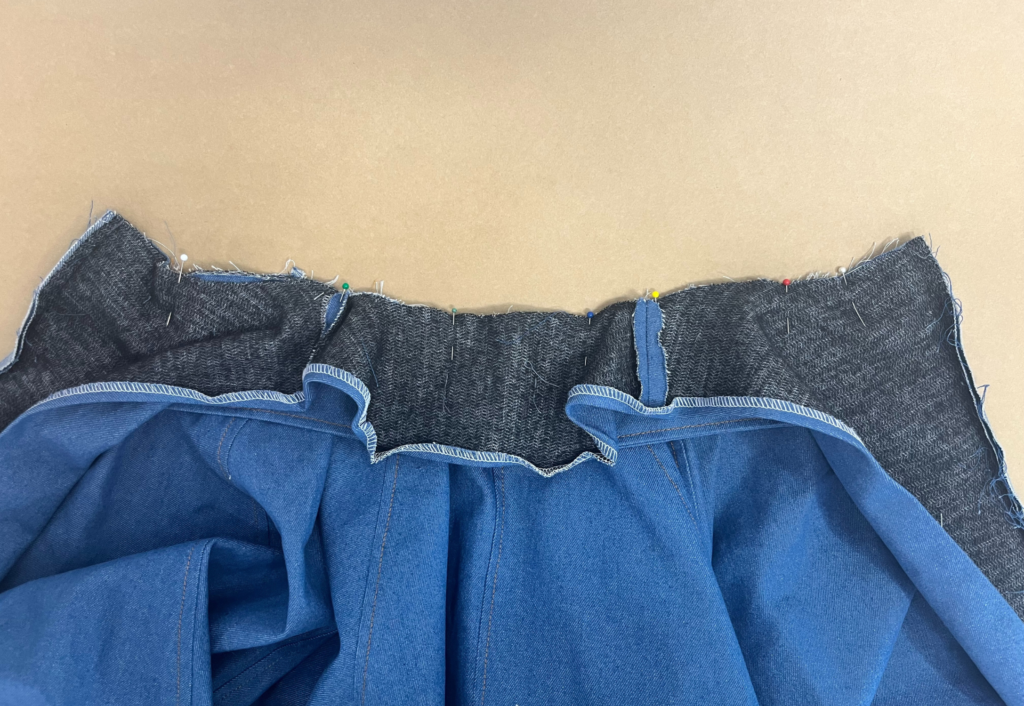
With right sides together, pin the neck facing to the main coat neckline, sandwiching the collar in between. Sew the facing to the main matching notches and shoulder seams. Clip the seam and the corners. Turn out and press. To make sure your back facing doesn’t move about, it’s a good idea to secure it to the seams.
Sew a 6mm (1/4”) top stitch or twin needle from the centre front neck notch in line with the collar edge across the top revere, with the needle down pivot and continue sewing down to the front to the hemline.
SIDE SEAMS AND UNDERARM SEAMS:
With right sides together and matching notches, starting at the sleeve cuff, sew the back to the front underarm seam and side seams, making sure the under-arm seams are aligned. Neaten with an overlocker or serger. Press to the back.
FRONT AND HEM FACING:
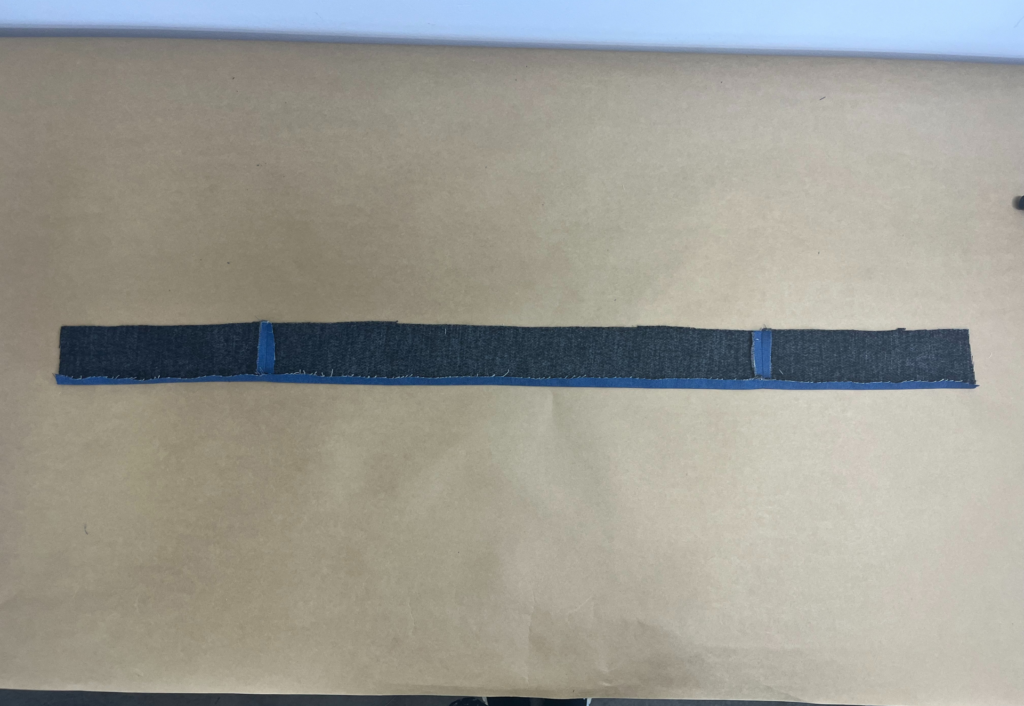
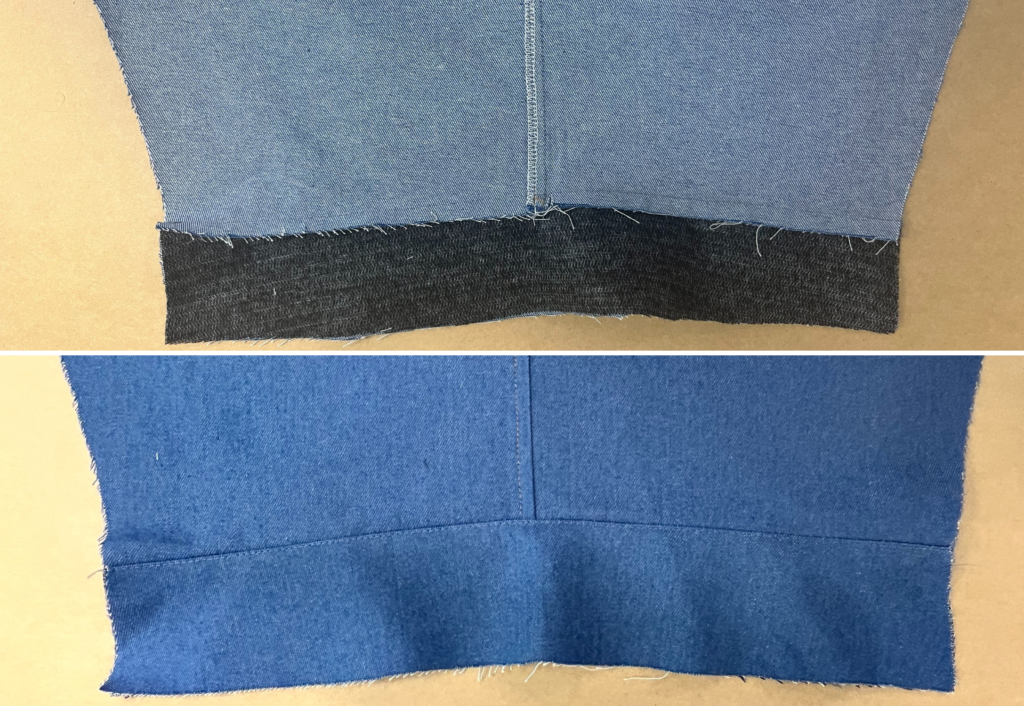
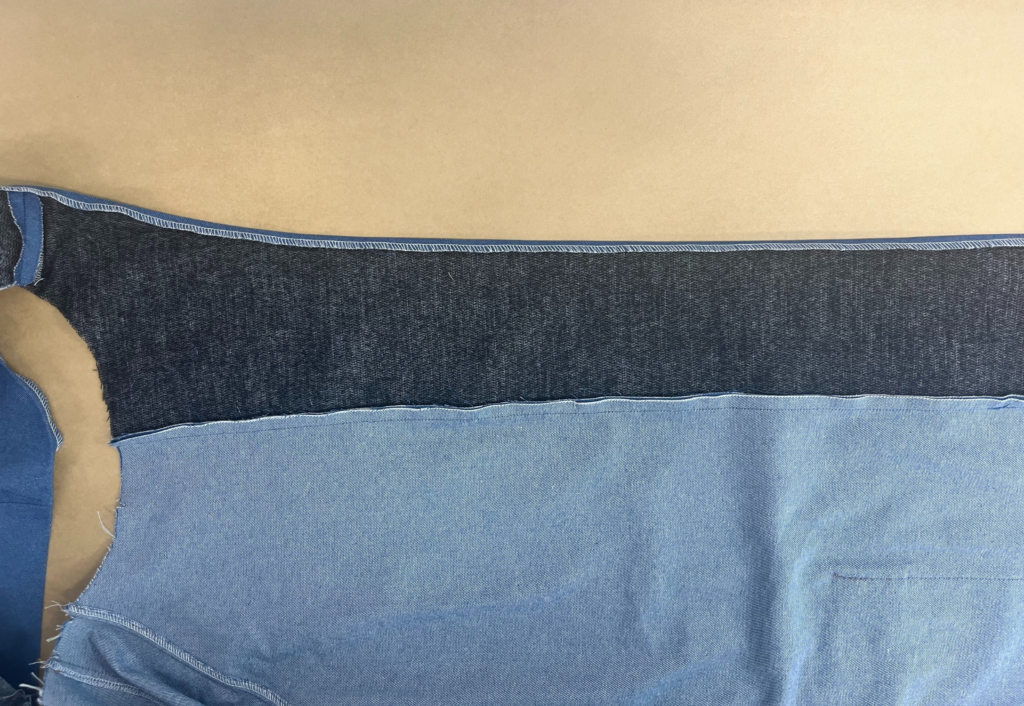
With right sides together, sew the hem facings together at the side seams (7 & 9 – long coat or 11 & 12 – short coat). Press open. Press top edge under 1cm (3/8”).
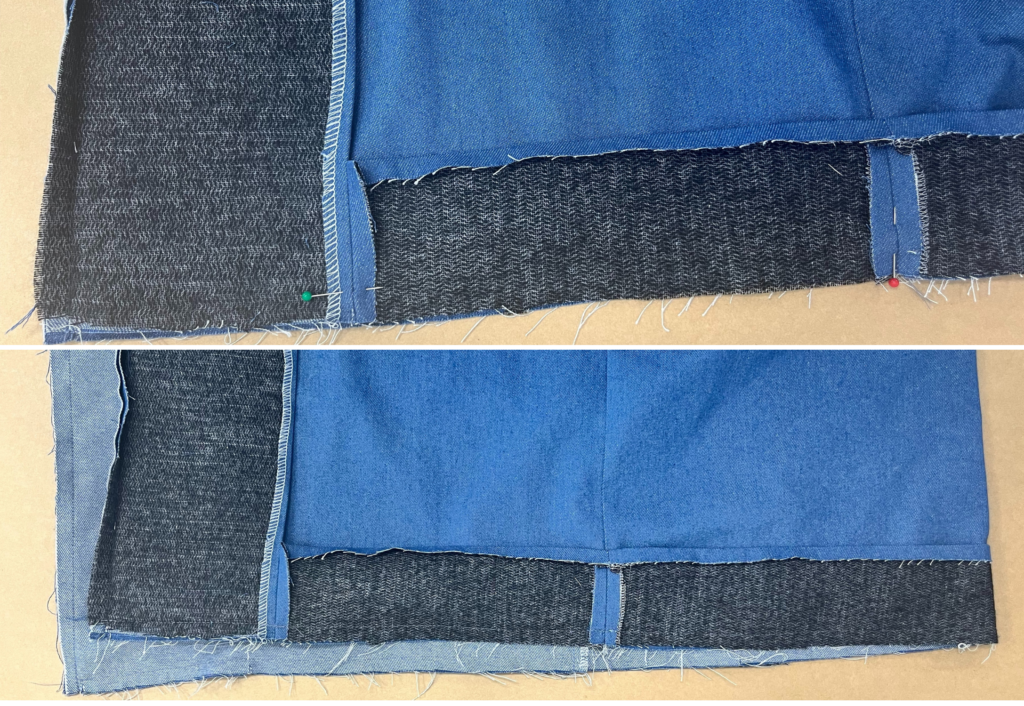
Take the short outer edges of the facing and sew them to the bottom of the overlocked edge of the front facing, 1cm (3/8”). Press open.
With right sides together sew the hem facing and the bottom edge of the front facing to the main body hem.
Clip the corners and turn out to the right side; press and sew an understitch on the side of the facing.
FINISHING FRONT FACING, POCKETS, HEM AND CUFF FACINGS:
Using plenty of pins to ensure the facing stays anchored in place, pin the front facing and hem facing to the inside of the main body. If using a contrast thread for top stitching a self-coloured top stitch can be used at this stage as a guide for the contrast top stitching.
Top stitch the outer edge of the edge of the facing from the front armhole seam down the front, finishing at the hem. Sew a 6mm (¼”) top stitch, or twin needle, around the top edge of the hem facing, starting at the outer edge of the front facing.
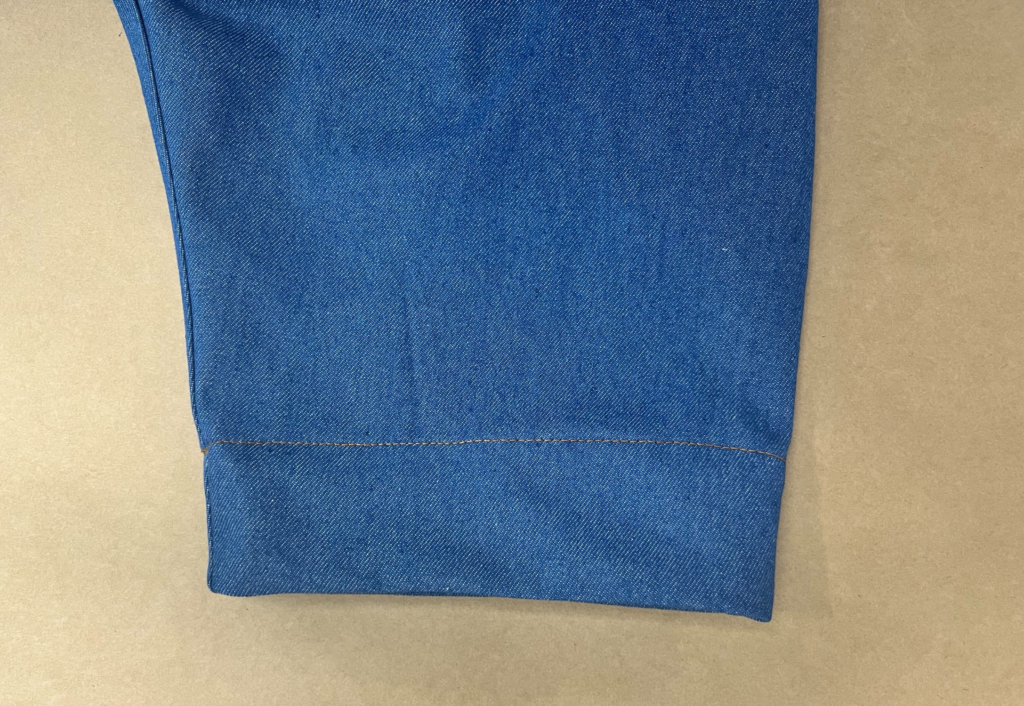
Turn the cuff facing to the inside of the sleeve and pin into place on the right side. Starting at the sleeve opening seam, so the back stitch isn’t so visible, top stitch the cuff facing into place and press.
POCKETS:
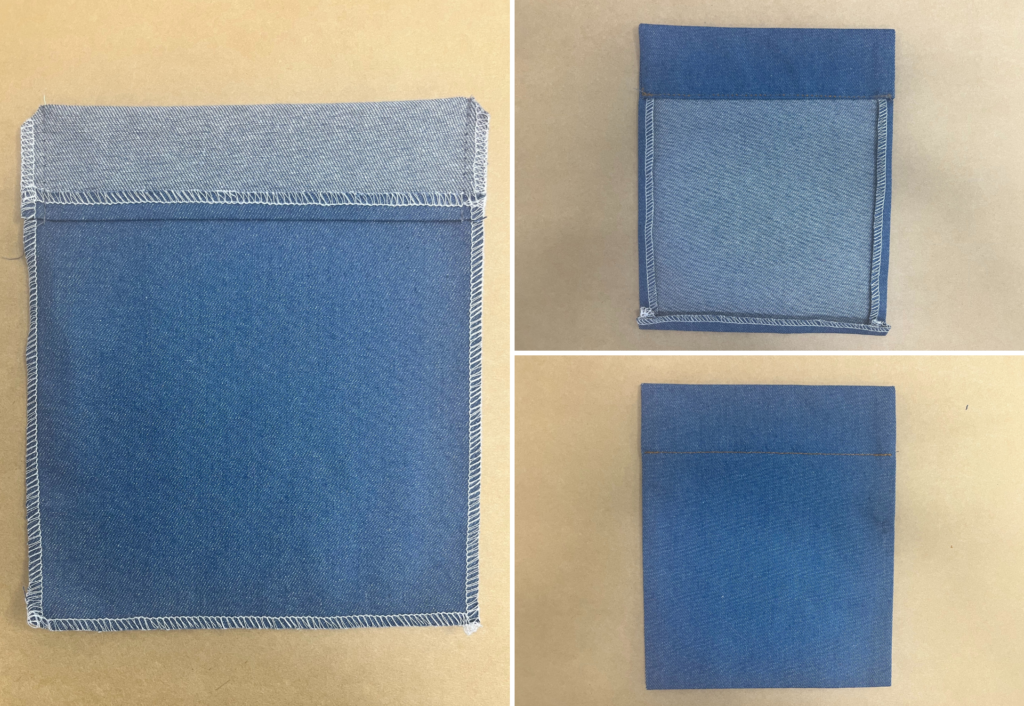
Neaten the four edges of the pockets with an overlocker or serger. Fold under the top of the pocket 1cm (3/8”), and press. Fold over the top of the pocket again at notch with right side on the inside and sew down the sides of the folded turn back, clip the corners and turn out to the right side. Press the edges under 1cm (3/8”) and sew a 6mm (¼”) top stitch or twin needle across the pocket turnback.
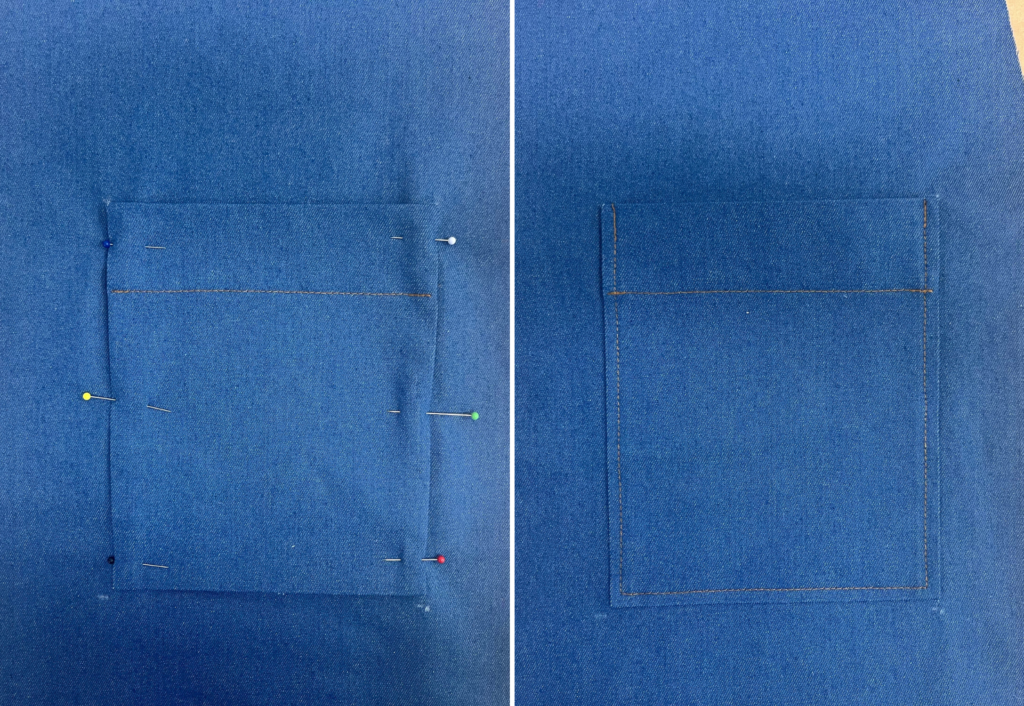

Matching corner of pockets to the markings and the vertical top stitching, stitch along the front of the main coat. Carefully pin the pocket into place and stitch down with a 6mm (¼”) top stitch or twin needle. The pocket will line up with the top stitching on the facing.
COMPLETION:
Stud the sleeves if using this option.
Clip any loose threads and carefully press your new coat!