CONSTRUCTION:
BEFORE YOU BEGIN:
Follow the steps in your Zalia Woven Dress or Top instructions for all styles, except the Neck Frill. If you are making the Neck Frill (5) option, please note that the V-neck instructions are slightly different, see the notes below.
NECK FRILL:
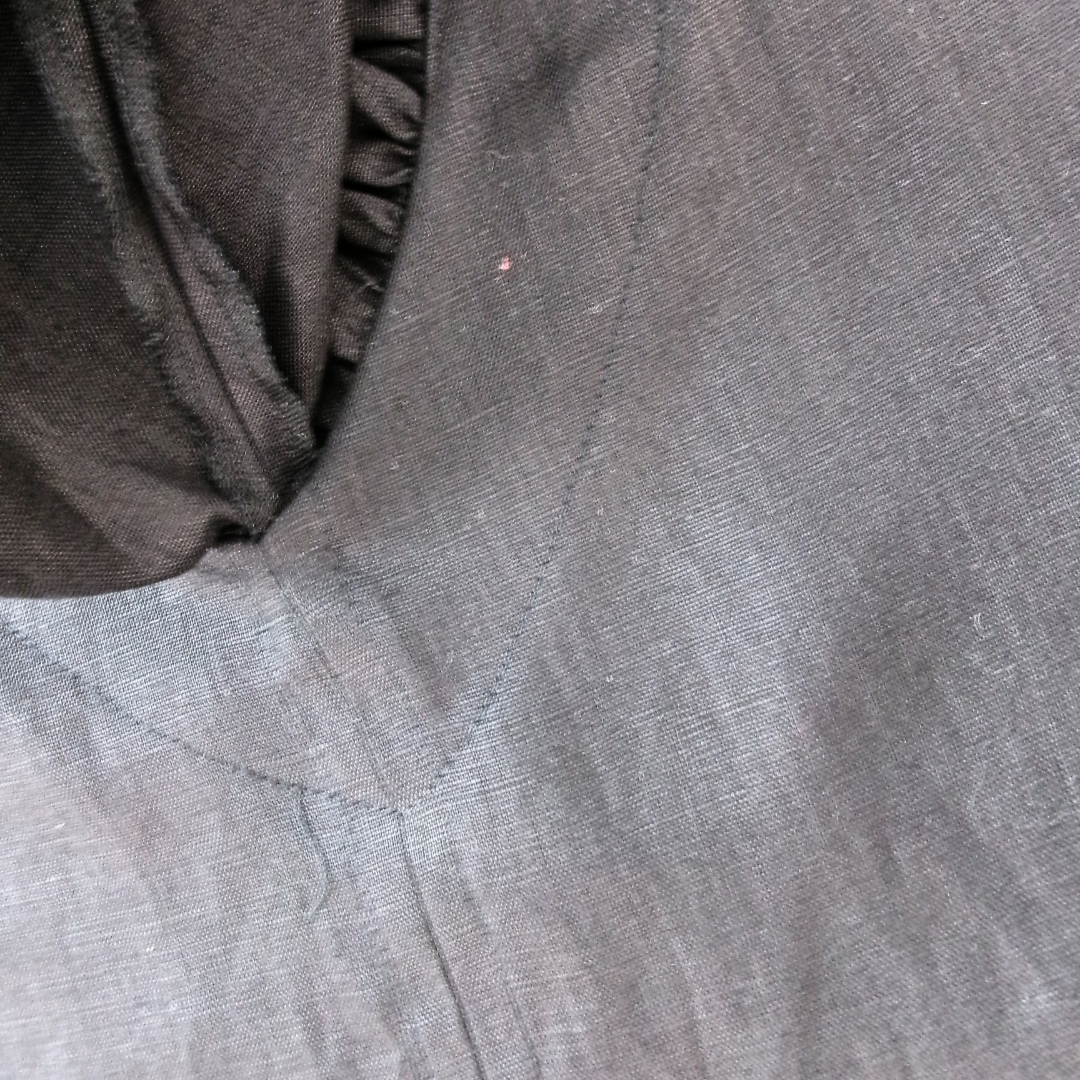
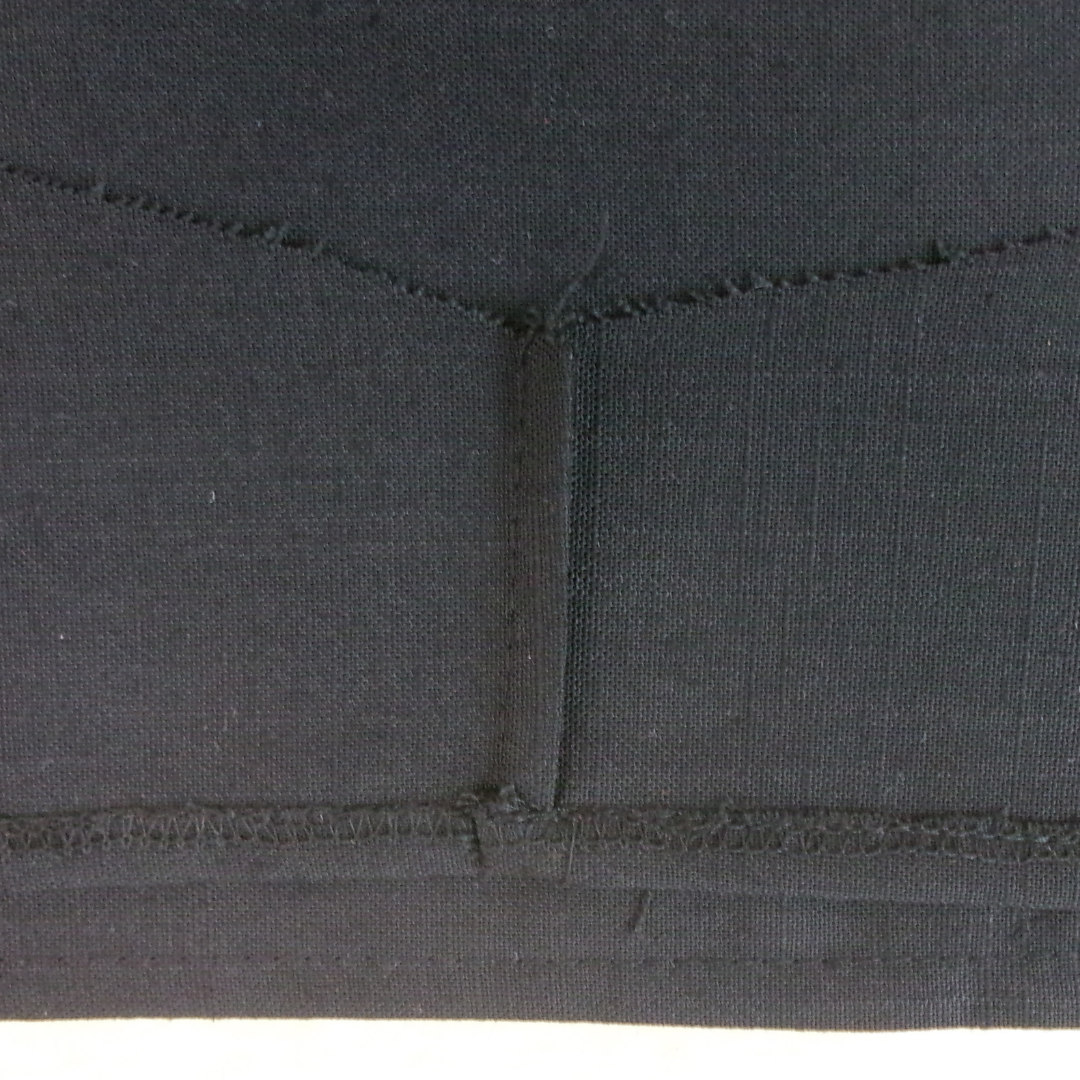
With RST sew the centre front seams of the body together from the hem up to the + marking on the pattern (6mm (1/4”) from the cut edge of the neck). Press the seam open and sew a 1cm (3/8”) topstitch either side of the open seam on the front body.
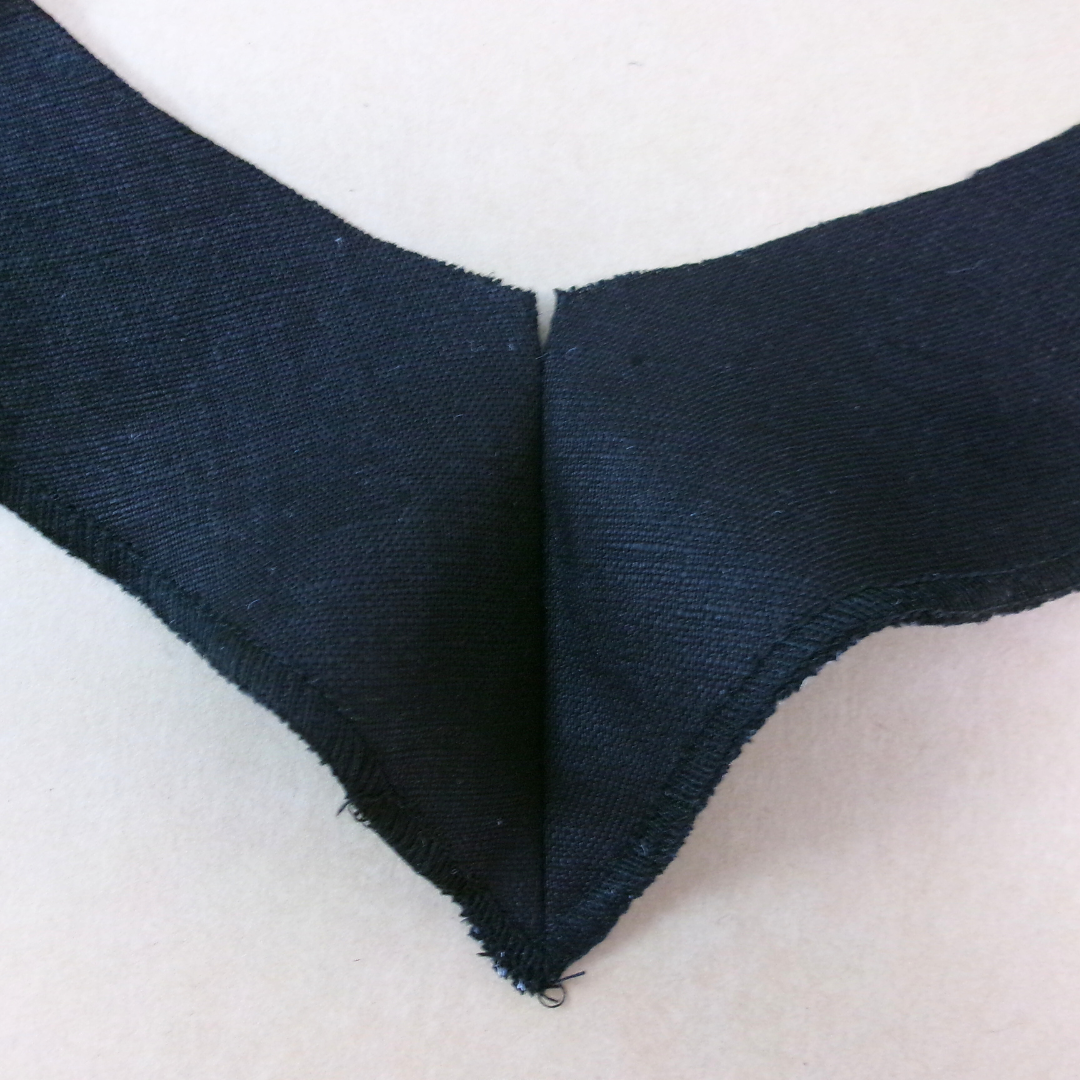
With RST sew the centre front seam of the “V” neck facing (8), stitch from the base of the facing and finish at the + marking on the pattern (6mm (1/4”) from the cut edge of the neck).
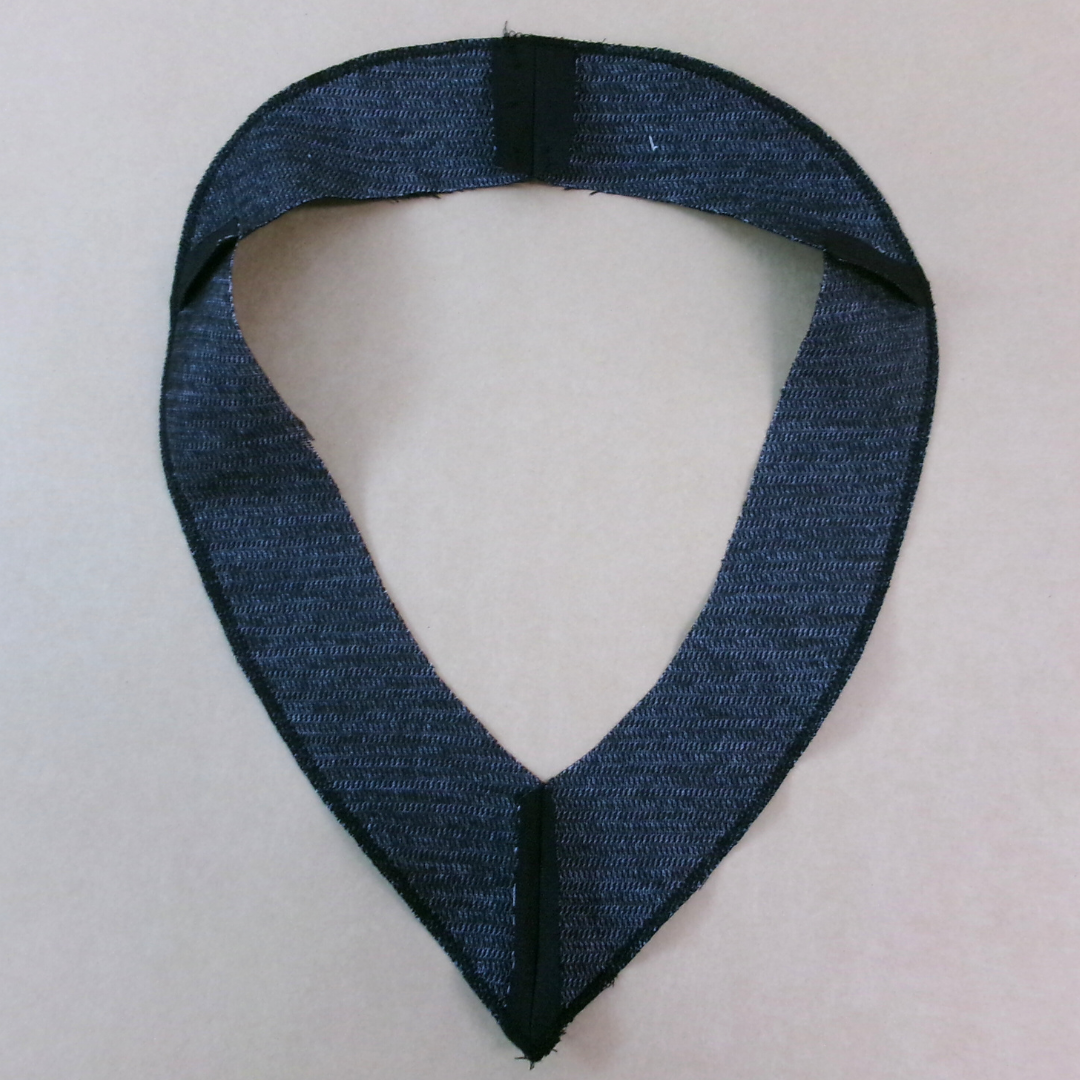
With RST sew the front and back neck facings (6 & 8) together at the shoulder seams and press open. Neaten the outer edges of the facing with an overlocker/serger.
With RST sew the front body to back body at the shoulders. Neaten with an overlocker/serger and press towards the back. Sew a stay stitch to the neckline to prevent stretching.
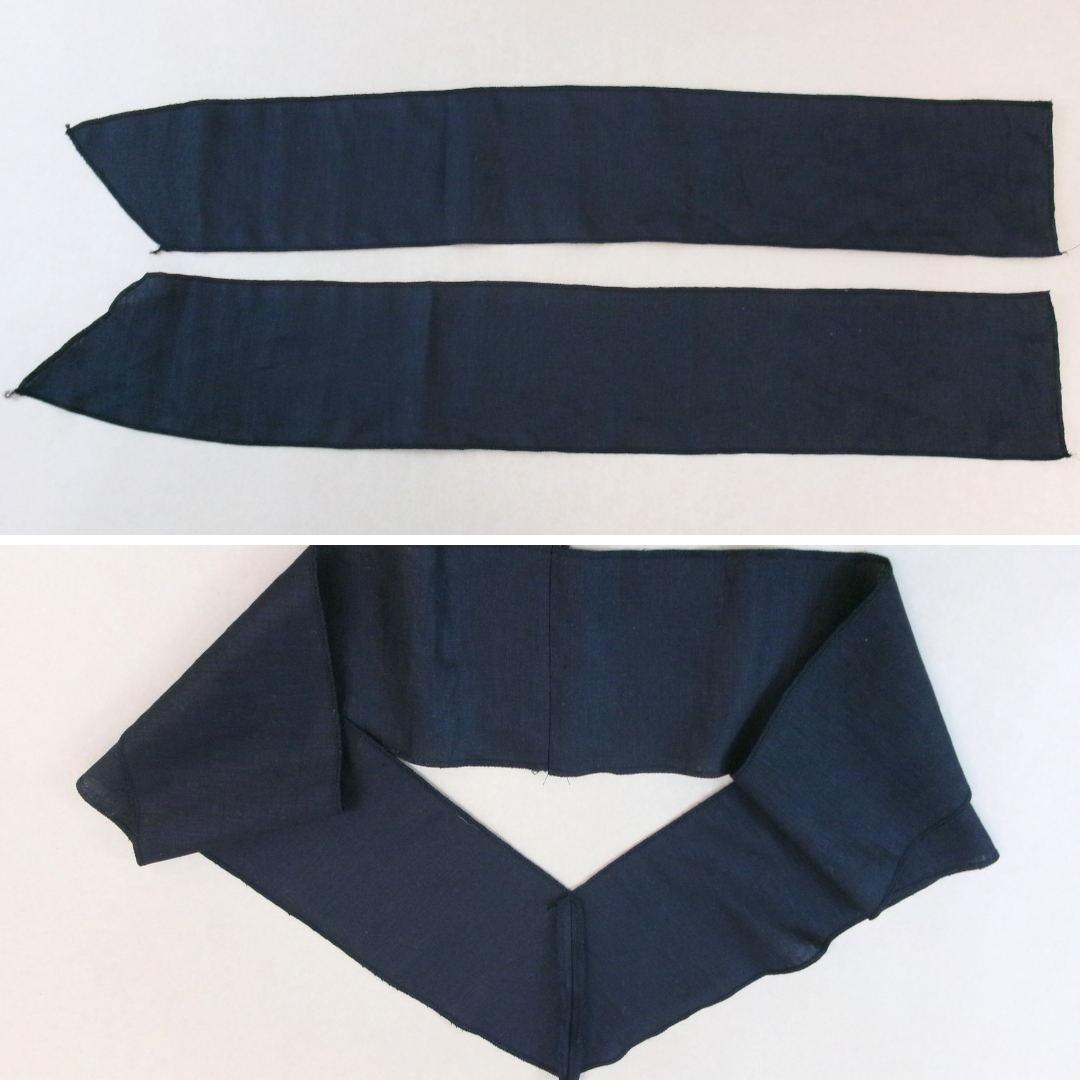
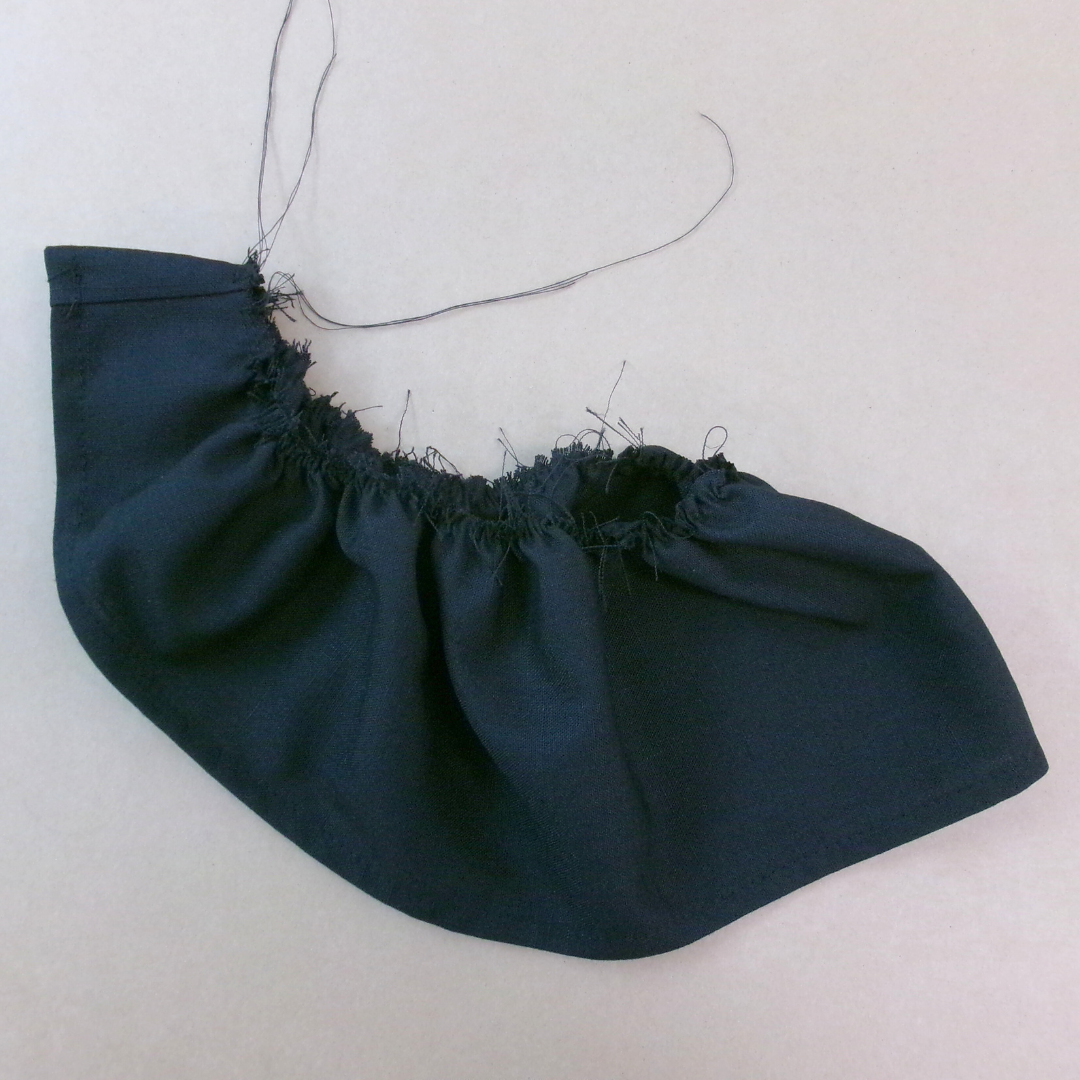
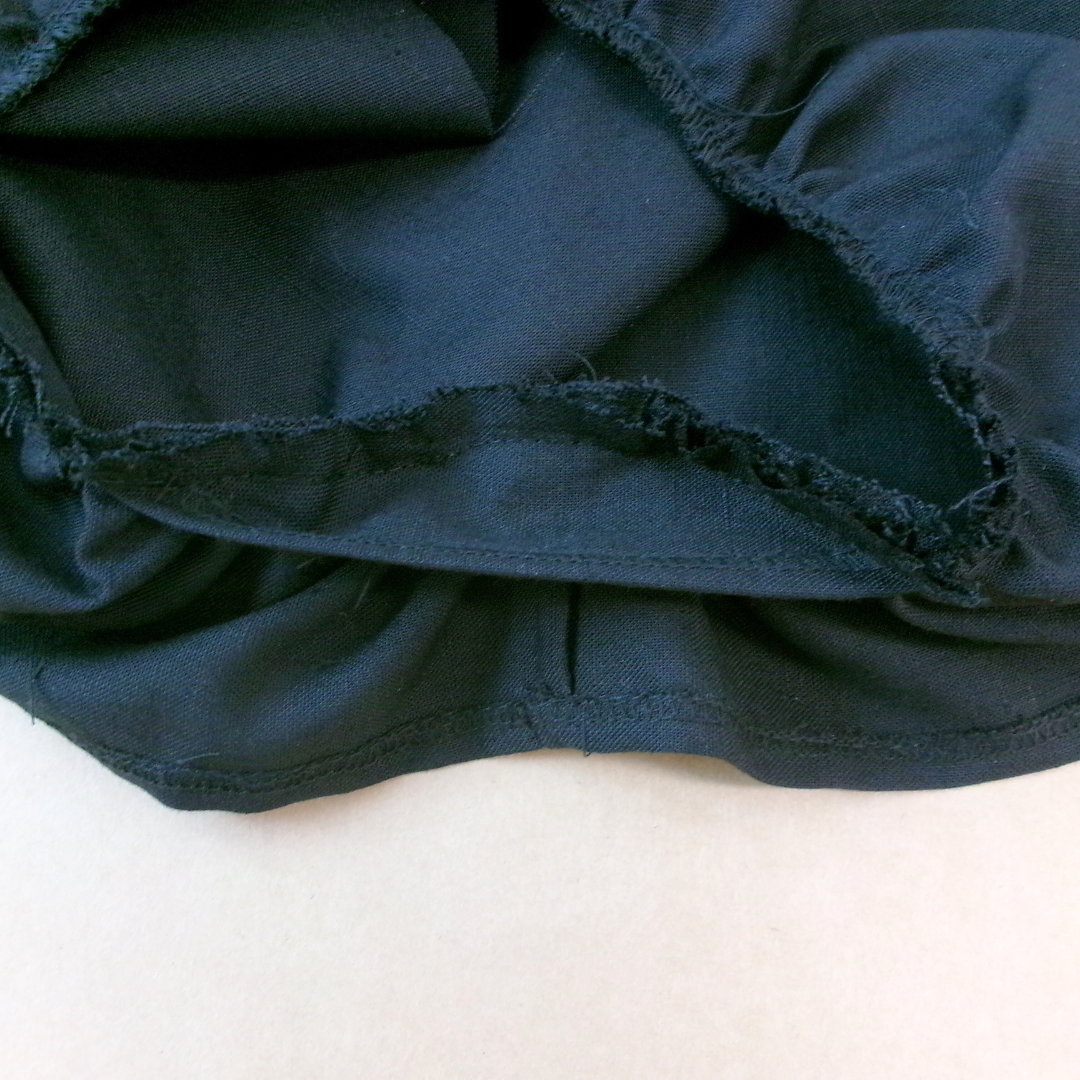
Neaten the short edges and outer edge of the neck frill (5) using an overlocker/serger. With RST, sew the pair of neck frills together at the centre front and back. Press open.
Turn the outer edge of the neck frill 1cm (3/8”) to the inside, press and top stitch.
Using a large gathering stitch, sew two rows of stitching to the neckline edge of the frill.
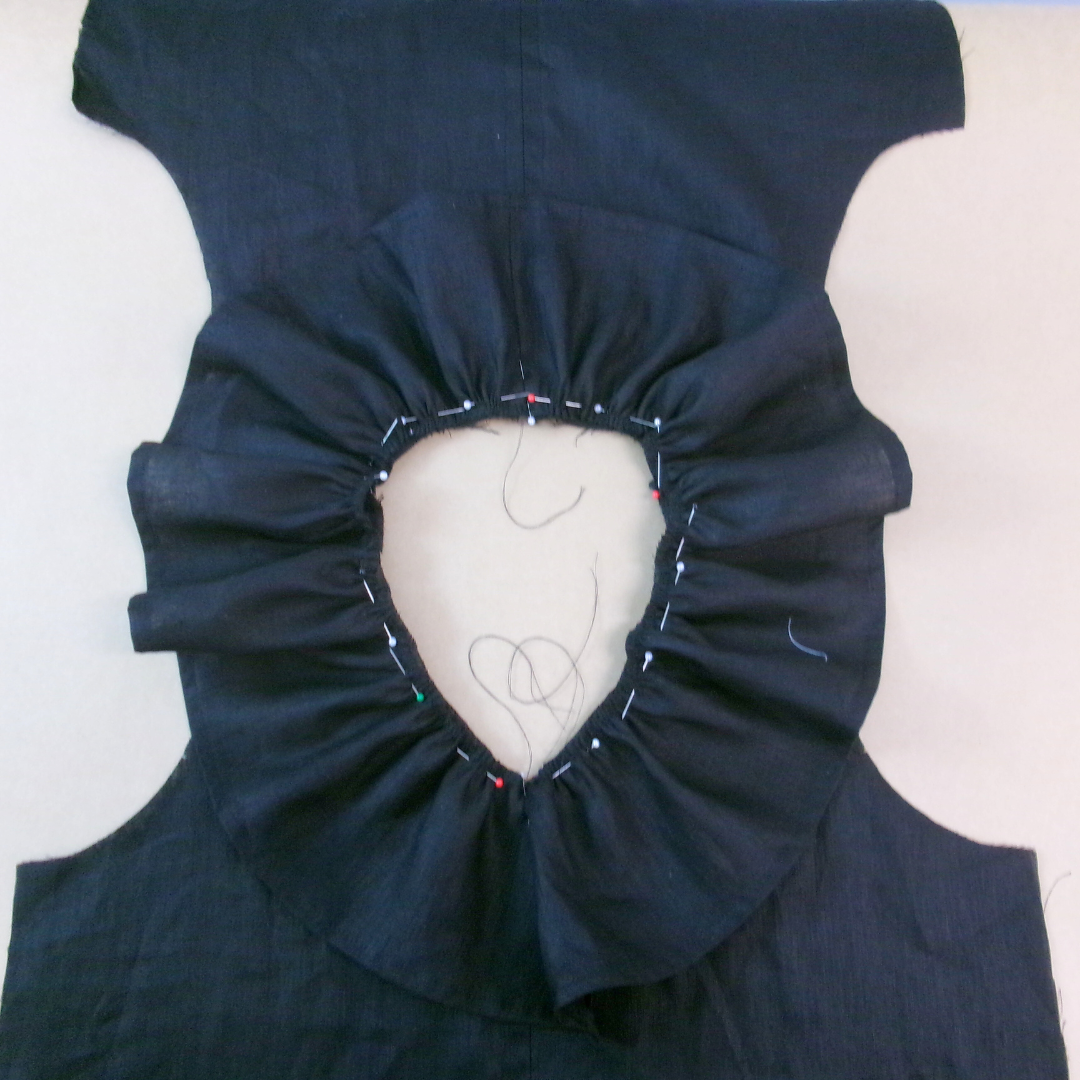
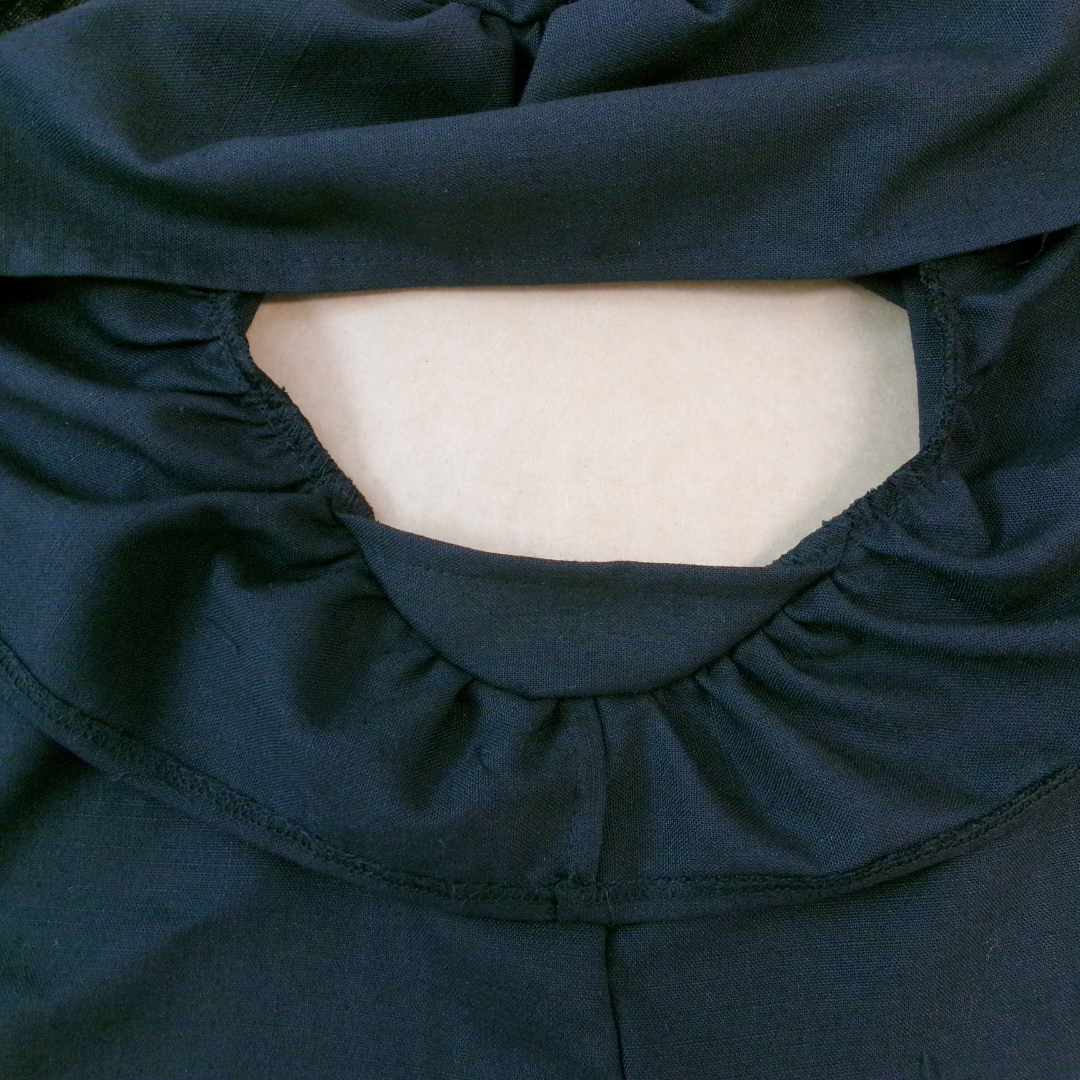
With the wrong side of the frill to the right side of the neck opening, gather the neck frill up to fit the neck opening, aligning seams and notches, pin, then baste into place.
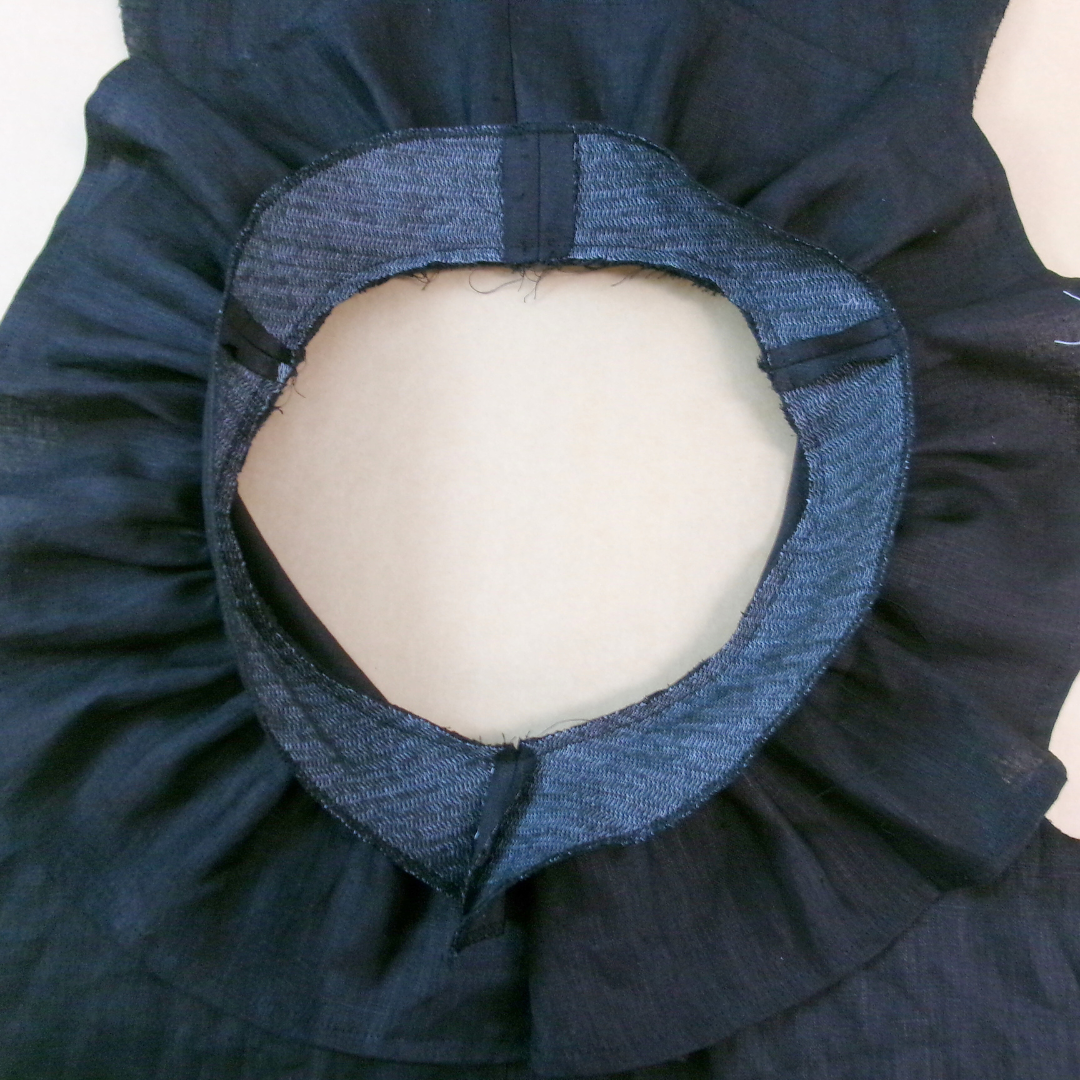
With RST and aligning seams, pin the neck facings to the neck opening, sandwiching the neck frill in between. Starting at one side of the V, sew the facing into place, finishing at the other side of the V. You may need to snip the frill at the V, ensuring a nice V shape.
Understitch on the side of the facing. Press the neck facing down, pin to the main body and top stitch.
Refer to steps 18 or 19 in the Zalia Woven Top and Dress instructions to continue.
FRILL SLEEVE:
Neaten the hem of the Frill sleeve (6) using an overlocker/ serger.
For the French seam – With WST, sew the short ends of the frill together using a small 4mm (1/8”) seam. This is the under-sleeve seam. Trim any loose threads and press to one side. Fold the seam with RST and sew a small 6mm seam, encasing the raw edge inside. Press towards the back. Turn up the sleeve hem 1cm (3/8”), press and topstitch.
Using a large gathering stitch, sew two rows of stitching along the seamline of the sleeve armhole, then gather up to match the circumference of the sleeve opening in the main body. With RST and notches aligned. Pin the frill sleeve to the arm opening, then sew into place.
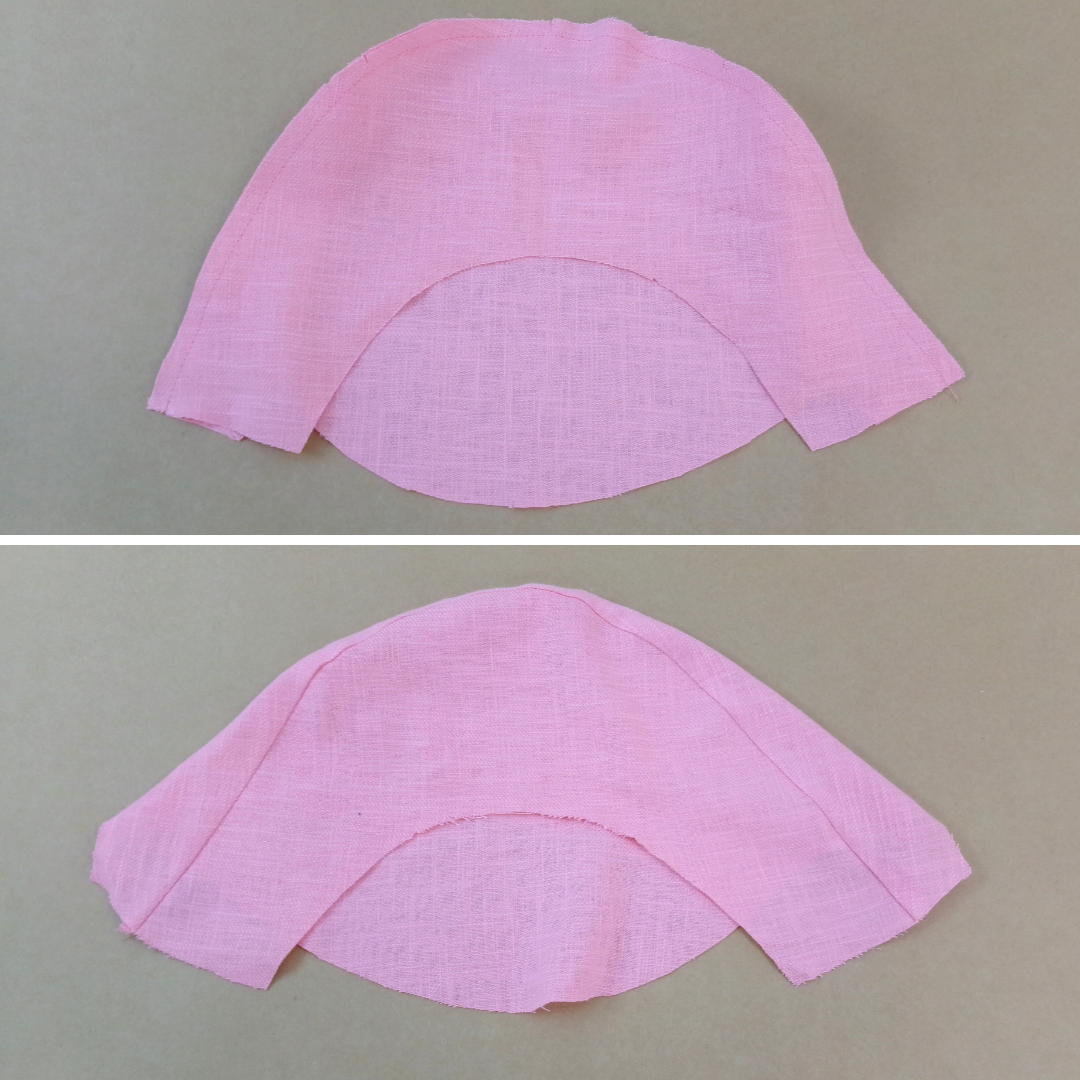
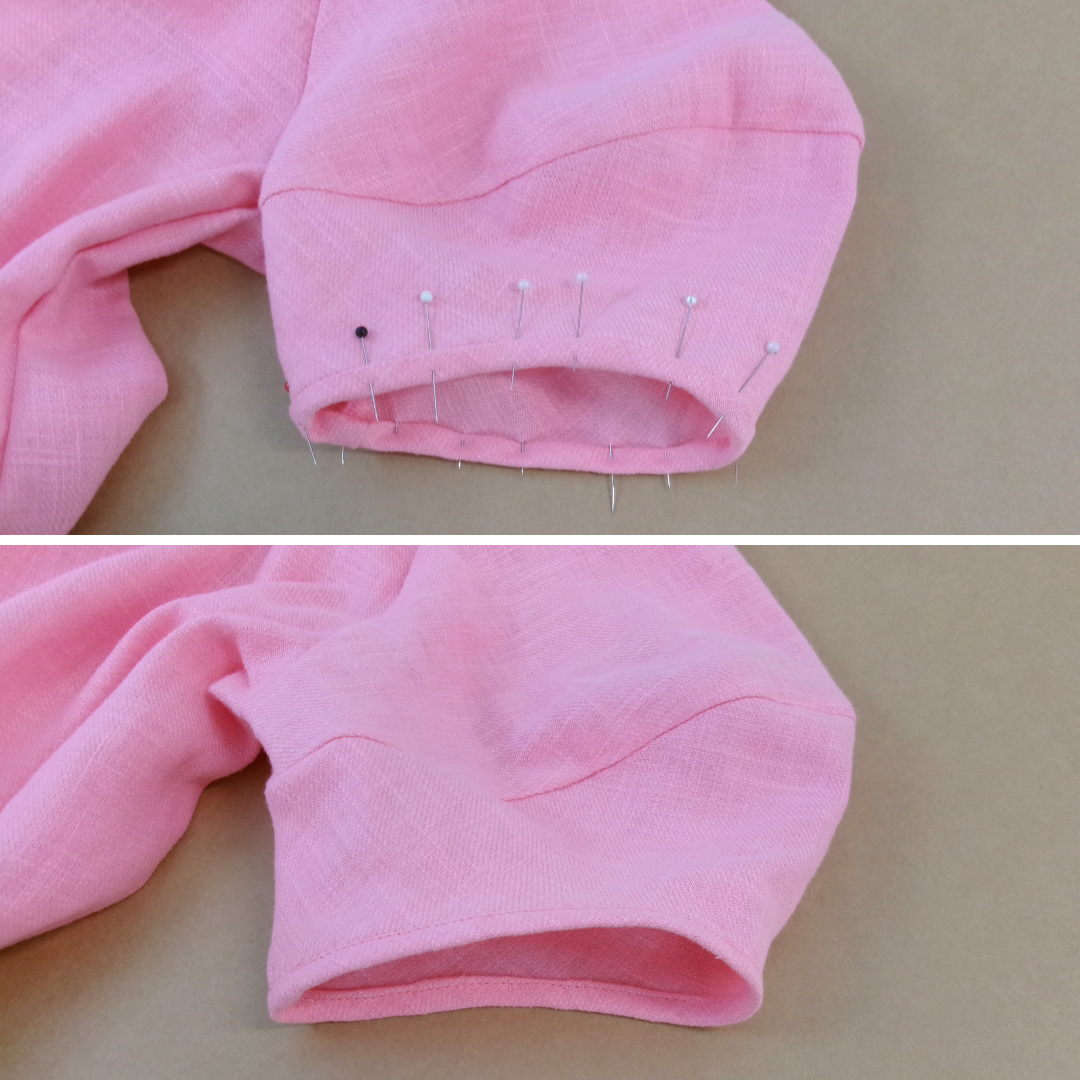
Optional Gusset – With RST, sew one pair of Gusset (4) along the straight edge. Understitch, fold in half, press. Baste the bottom edges together. With RST, pin the gusset to the arm opening, over the side seam, sandwiching the frill in between. Sew the gusset into place.
Neaten around the armhole using an overlocker/ serger. Press towards the body.
LANTERN SLEEVE
With RST and aligning notches, pin the Lower Lantern Sleeve (9) to the Top Lantern Sleeve (10) at the centre seam. Sew then neaten using an overlocker/serger and press upwards.
With RST, sew the under-sleeve seam, neaten using an overlocker/serger and press towards the back.
With RST, sew the short ends of the Bind for Short Sleeve (4) together and press open. Pin the right side of one binding edge to the wrong side of the sleeve opening. Sew using a 6mm (1/4”) seam and press towards the binding. Fold the raw edge to the inside 6mm (1/4”), press, then fold again, encasing the seam. Pin into place then edge stitch. Press.
Sew a long ease stitch to the head of the sleeve and draw in slightly, avoiding any tucks. With RST and notches aligned, pin the sleeve to the arm opening. Sew, then neaten using an overlocker/serger and press towards the sleeve.
PINTUCK SLEEVE
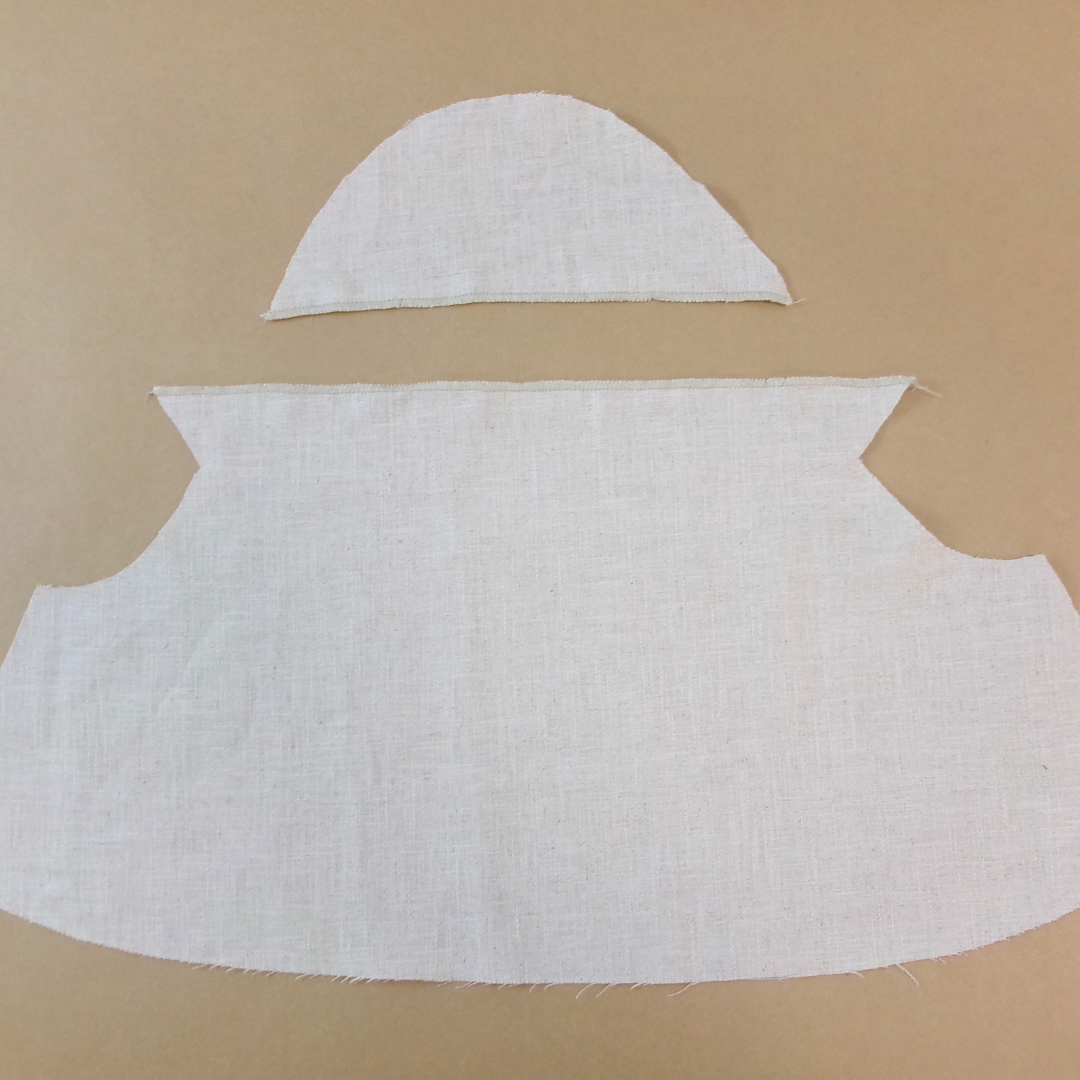
Neaten the top edge of Pintuck Sleeve (8) and lower edge of Pintuck Sleeve Cap (7) using an overlocker/serger.

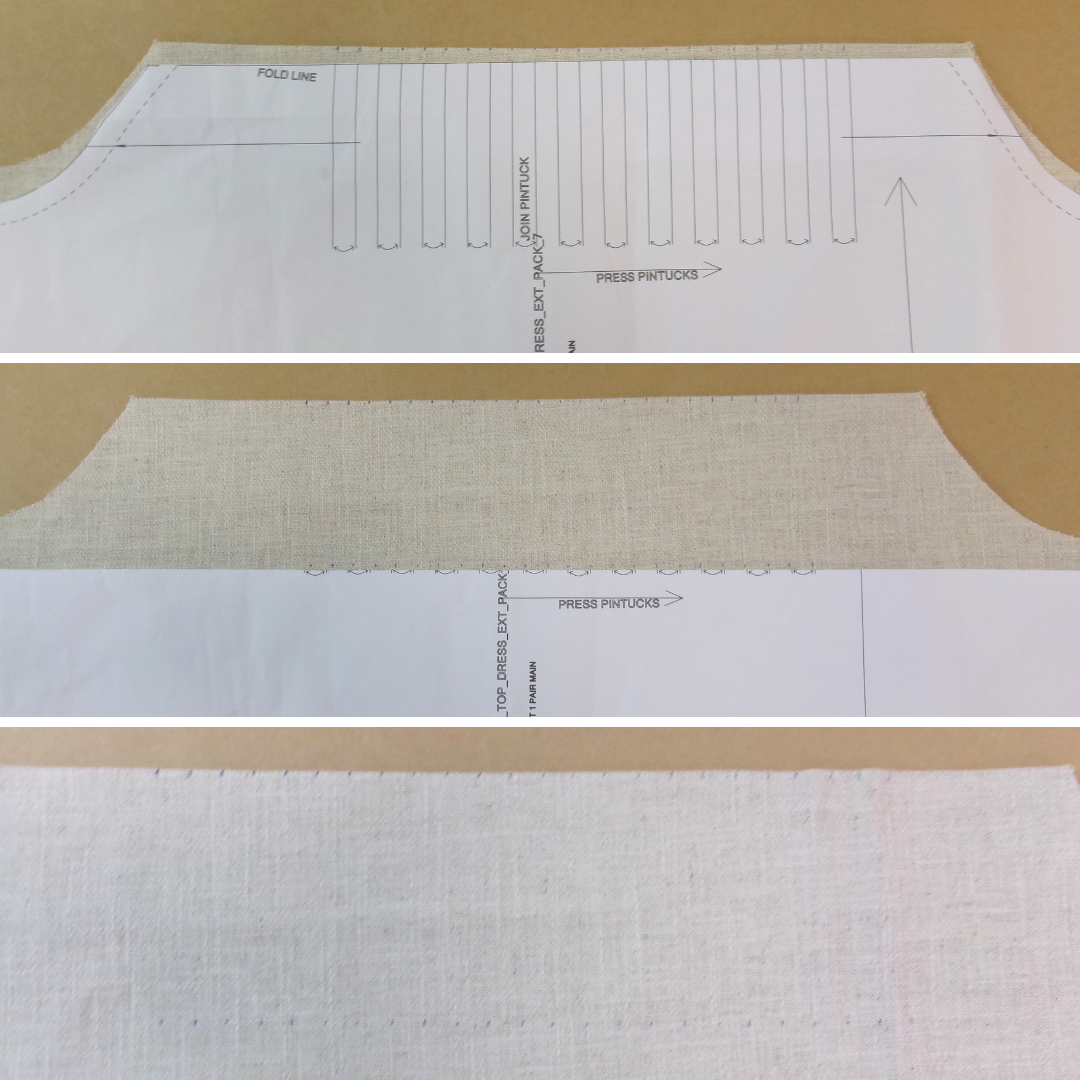
Fold the Pintuck Sleeve under at the fold line as shown on the pattern, press. Fold the pattern piece at the fold line as well, to use as a guide. Place the pattern piece on top of the fabric sleeve, and using an erasable pen, mark in the pintucks along the folded edge.
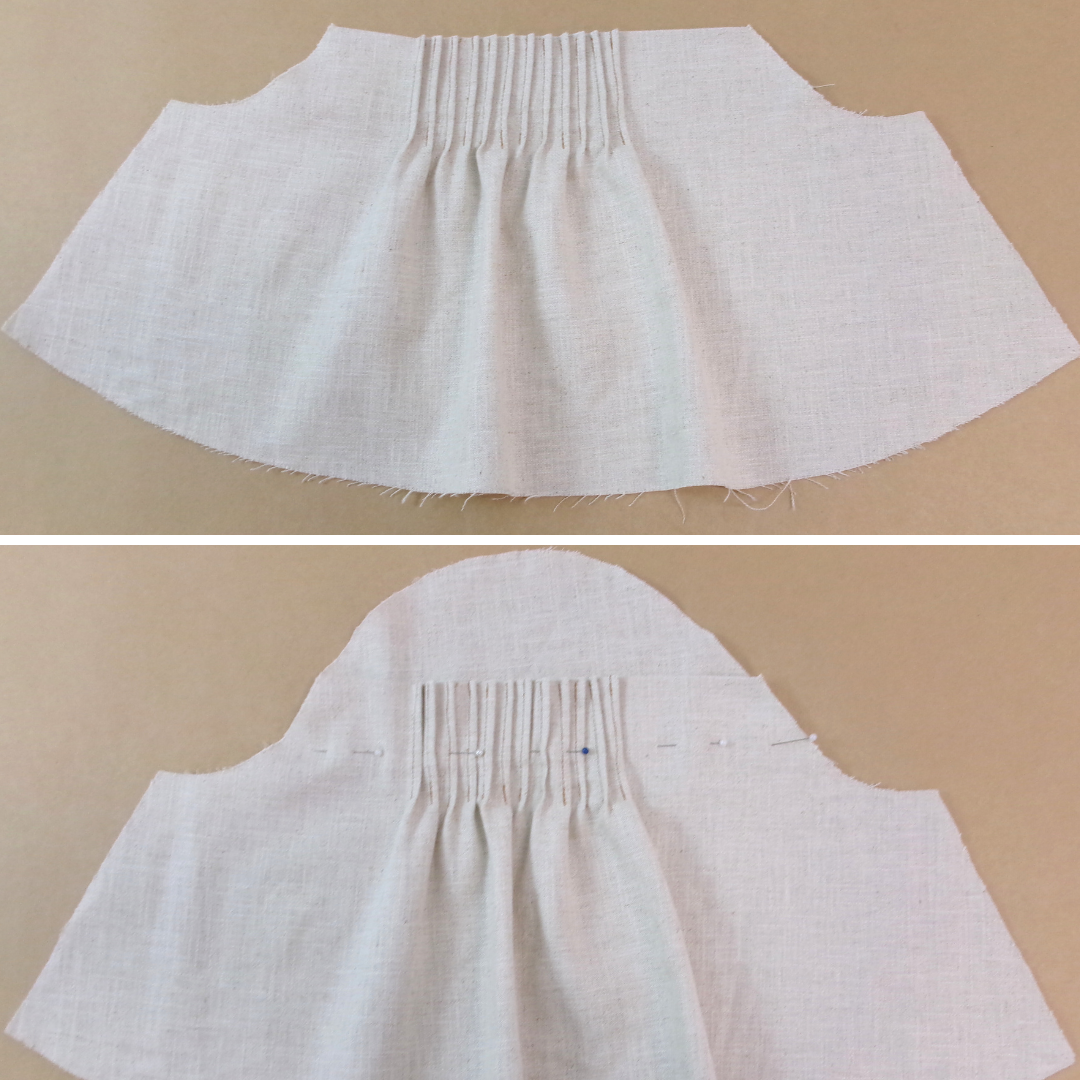
Sew the pintucks and press towards the back sleeve. Trim any loose threads.
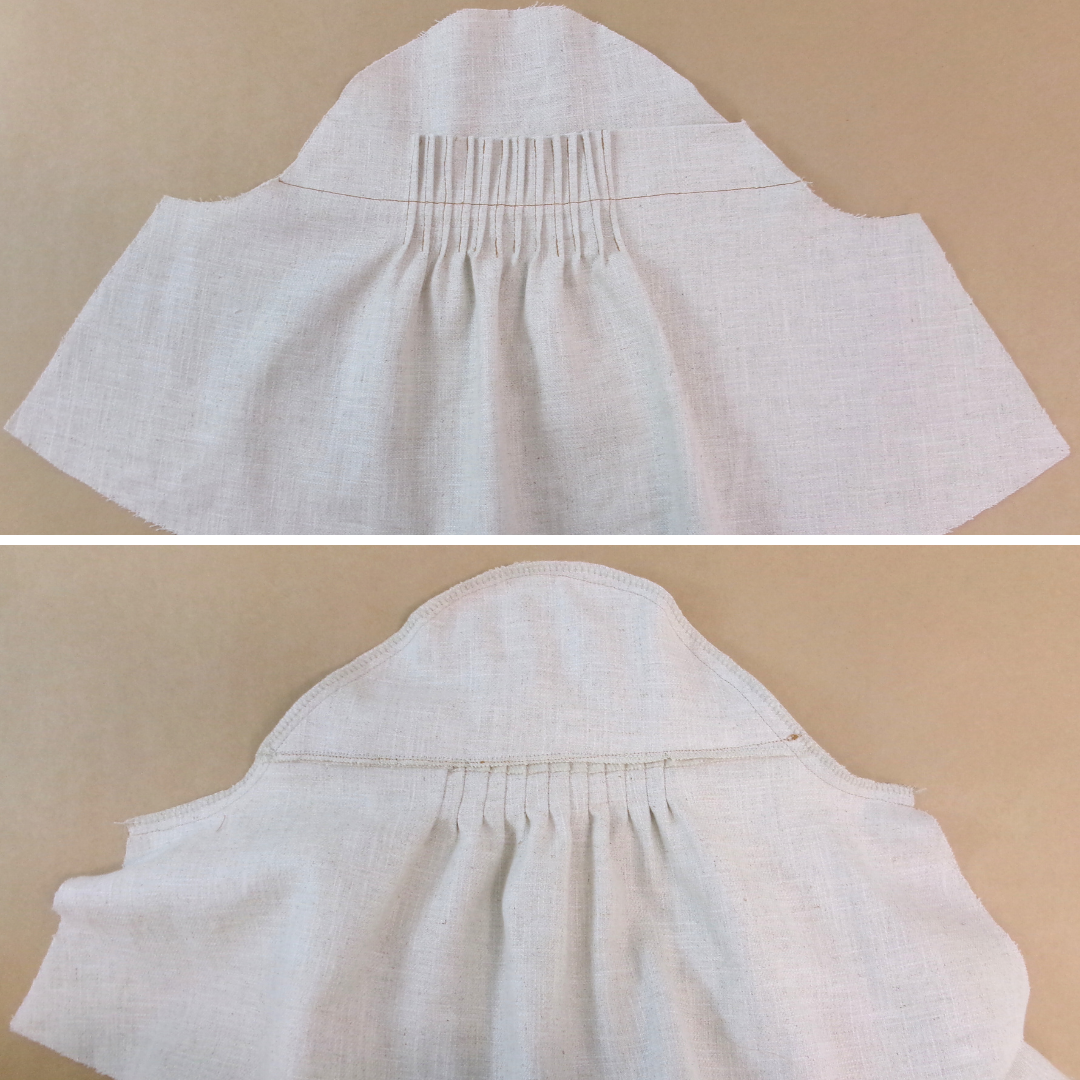
Place the Pintuck sleeve on top of the Pintuck sleeve cap, matching the neatened edges and aligning notches, pin, then stitch across with a top stitch.
With RST sew the under-sleeve seam, neaten using an overlocker/serger and press towards the back. Neaten the hem of the sleeve using an overlocker/serger, turn to the inside 1cm (3/8”) and top stitch.
With RST and notches aligned, pin the sleeve into the sleeve opening. Sew, then neaten using an overlocker/serger and press towards the sleeve.