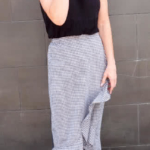
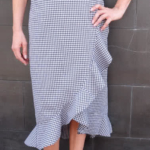
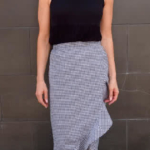
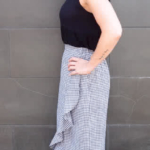
This wonderful wrap pull-on skirt features an elegant flounce detail, and sits mid-length. Are you looking to update to your event wardrobe? Well this is the ultimate skirt for you! This is the perfect beginner sewing project. The skirt has an elastic waistband at the back of the skirt that allows you to pull it on, whilst the front waistband sits flat. And let’s not forget, it’s the on-trend skirt of the season!
Fabric Suggestion
Rayon, silk, crepe or any fabric suitable for flounces.
Trims
Elastic 3 cm or 1 1/4" wide (see below for your cut size)
Elastic (Finished measurement. Allow 2 cm or 3/4" for seam allowance)
- Size 4: 37 cm (14 5/8 in)
- Size 6: 39 cm (15 3/8 in)
- Size 8: 42 cm (16 1/2 in)
- Size 10: 44 cm (17 3/8 in)
- Size 12: 46 cm (18 1/8 in)
- Size 14: 49 cm (19 1/4 in)
- Size 16: 51 cm (20 1/8 in)
- Size 18: 54 cm (21 1/4 in)
- Size 20: 58 cm (22 7/8 in)
- Size 22: 62 cm (24 3/8 in)
- Size 24: 66 cm (26 in)
- Size 26: 70 cm (27 1/2 in)
- Size 28: 74 cm (29 1/8 in)
- Size 30: 78 cm (30 3/4 in)

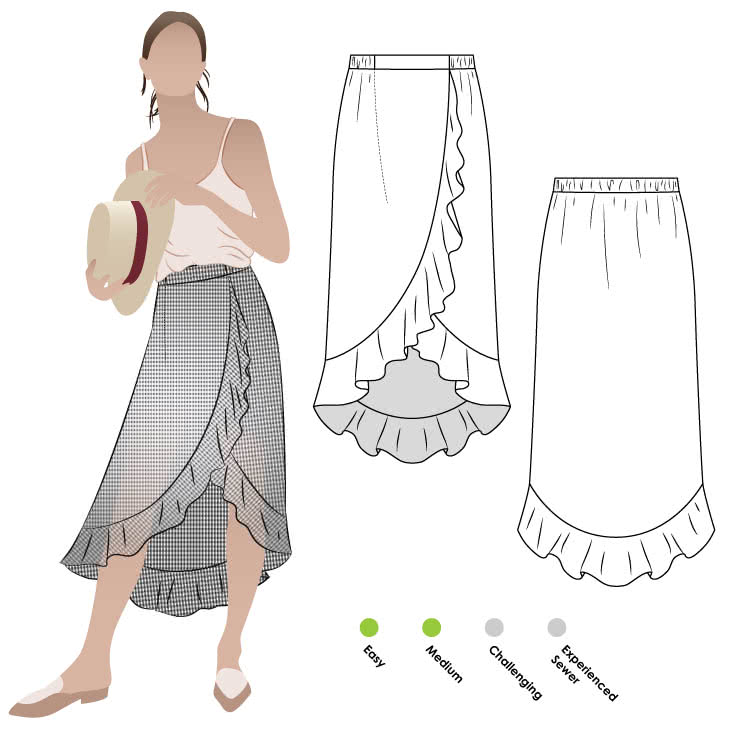
Format Reviewed: PDF Digital Pattern - Single-Size
k*********s (verified owner) – :
I love how this skirt turned out. Pattern was easy to follow, although to accommodate the french seams I increased the seam allowance 5/8″ and cut out the next size up. I used Rifle Paper Company rayon and Ii came out beautifully and fits nicely too! Can’t wait to wear it in May – still waiting on spring!!!
Format Reviewed: PDF Digital Pattern - Single-Size
J**y (verified owner) – :
LOVE this skirt pattern! I made it in a dusty blue double gauze for summer and it could not be more comfy. The flounce allows for dressing it up a notch, too! I found it an easy make and will make it again. Highly recommend!
Format Reviewed: PDF Digital Pattern - Single-Size
E***N (verified owner) – :
I just made my first Ariel skirt in size 8. It’s absolutely gorgeous and I see myself making this one again as it fits me well. I will have to agree with the other reviews on the waistband being a bit tight. I think next time, I’ll add about a .5-1 inch more of the elastic to the back to shimmy over my hips a bit easier. I also found the directions on attaching the waist to the skirt a bit confusing and got myself into some issues there. However, now that I see the finished piece- I have a better idea of how I’d want to approach it in the future. This was my second time ever doing a flat front-elastic back waist and it definitely helps to watch a few youtube videos before attempting it by only reading the pattern directions. I wish I’d found these videos prior to my two experiences in this back elastic waistband sewing.
Format Reviewed: PDF Digital Pattern - Single-Size
C***l (verified owner) – :
I love the pattern and used broderie Anglais with gerogette overlay for the front with an embroidered lace flouce. I used the embroidered lace as an overlay over pink for the back, and made a jacket out of the same fabric as the back of the skirt.
I then made a camisole with the broderie Angalis with georgette and then a hat to go with it, to wear to the next Melboure Cup.
The only thing I was not fussed on was the very scant instructions on the flounce, poorly written, and if you were a beginner you would wonder, it only says pin the flounce, there is no mention of the sewing part. This can throw off a new sewer, and I think the designer of the pattern should have put more information on the sheet.
Format Reviewed: PDF Digital Pattern - Single-Size
N*****a (verified owner) – :
I made this in a size 22 for myself, used an ankara polycotton fabric, pdf came together easily, and the written instructions were enough to sew the skirt together.
Lovely pattern, will definitely use again!
Format Reviewed: PDF Digital Pattern - Single-Size
s************n (verified owner) – :
Love how this skirt turned out – I made it in a floral cotton linen blend fabric and the flounce has a beautiful drape. However, the pattern instructions were very light on, although the skirt was basic enough to work it out. The waistband is small in comparison with the hip, so I need to squeeze this over my hips and it is slightly lax on my waist line – but the result looks so nice it is worth this small inconvenience.
Format Reviewed: Printed Pattern - Multi-Size
A****Y (verified owner) – :
I made a size 14 in a polka dot black with white spot. The flounce was in a crepe with with black spot. Looks great. Pattern was usual great fit. Not as much ease as usual getting on and off but that’s the extra covid lockdown weight!😂
Very comfy to wear and enjoyable to make. I love a flounce. Will make again . Planning a scuba crepe with a chiffon flonce.
Format Reviewed: PDF Digital Pattern - Single-Size
s************n (verified owner) – :
Very cute skirt! Construction was fairly easy but I’m not in love with the waistband. Not sure if the flat part of the waistband needs to be larger or smaller but besides that, this was a quick and SUPER cute make!
Format Reviewed: PDF Digital Pattern - Single-Size
N****a (verified owner) – :
Great skirt and very easy to construct. My only suggestions for improvement would be that the instructions tell you when to finish each seam and there is a better guide for sizing of finished garments. At the moment it only gives you the size 10 rather than all sizes.
Format Reviewed: Printed Pattern - Single-Size
B******A (verified owner) – :
Love 💕 this skirt . I made it in a rayon fabric and it just floats in this design and is lovely to wear. It did take me a wee while to work out the cutting layout and make sure your pattern pieces are placed exactly as stated on the pattern piece. I didn’t like the waistband construction though, but hey who cares when you end up with a beautiful skirt . Another StyleArc winner!
Format Reviewed: PDF Digital Pattern - Single-Size
J******r (verified owner) – :
Make sure you read the pattern pieces carefully before cutting as some pieces need to be facing the right way. Other than that it’s a great pattern. Results were super and I’m definitely planning to make more. Lovely pattern.
Format Reviewed: PDF Digital Pattern - Single-Size
j*******t (verified owner) – :
I made this skirt in a size 14 for my daughter. I used rayon to make this skirt. The pattern was very simple to put together. It would be ideal as a beginner project despite the instructions being very scant. I however am experienced in sewing so didn’t really need the instructions. My daughter loves the dress and has worn it many times since I made it a week ago.